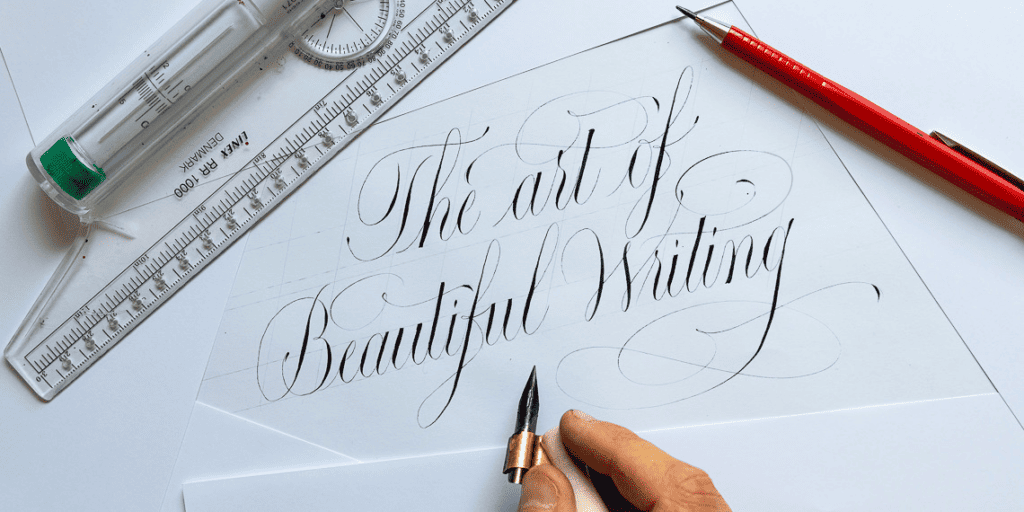
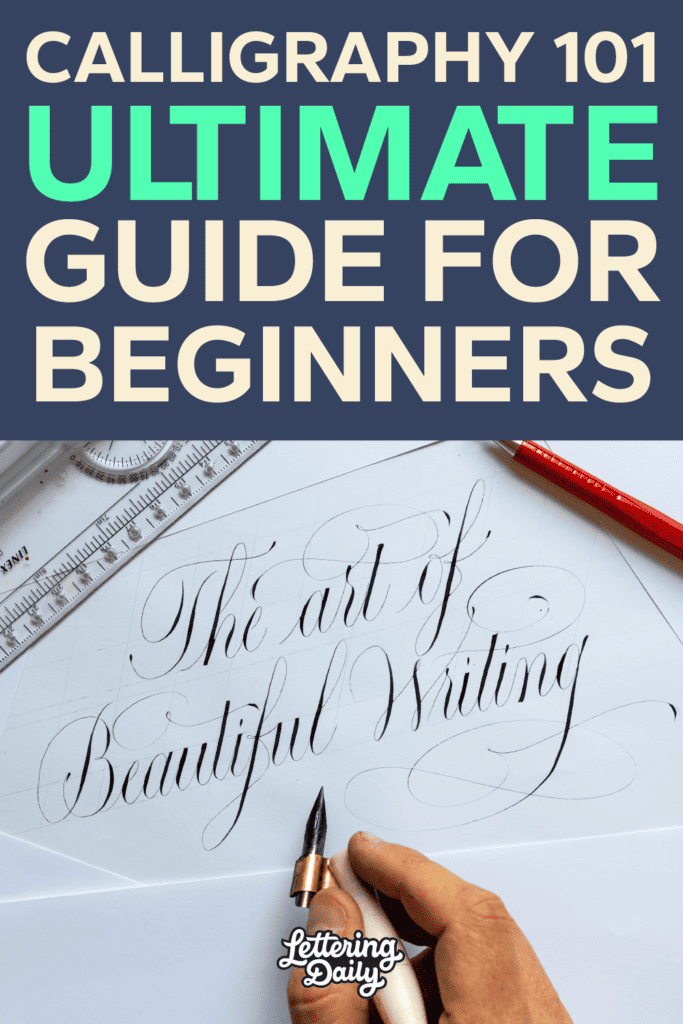
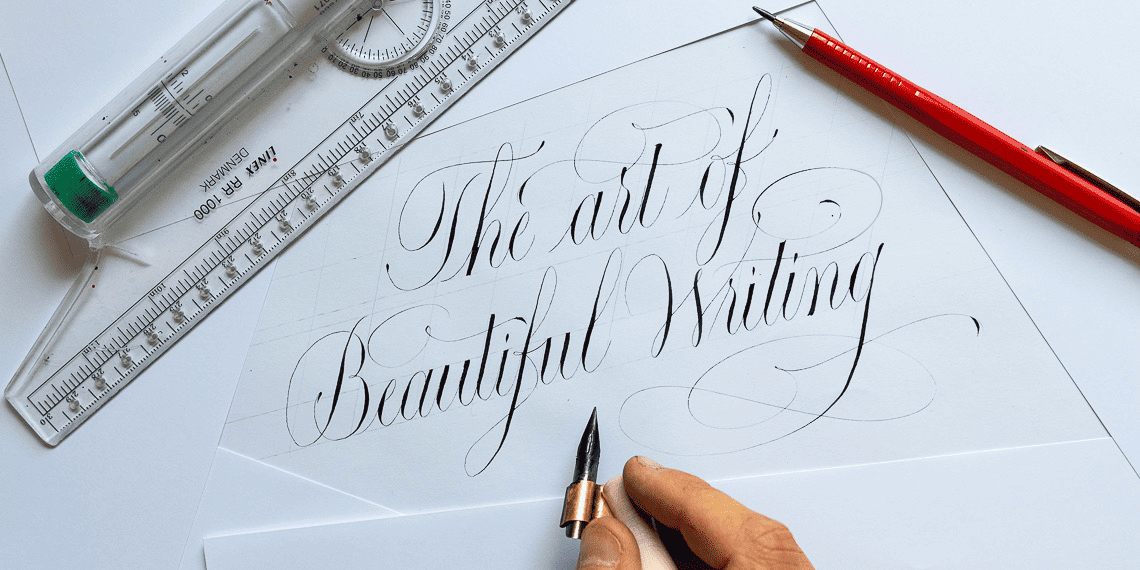
So you want to learn calligraphy, but you’re not sure where to start?
Fear not!
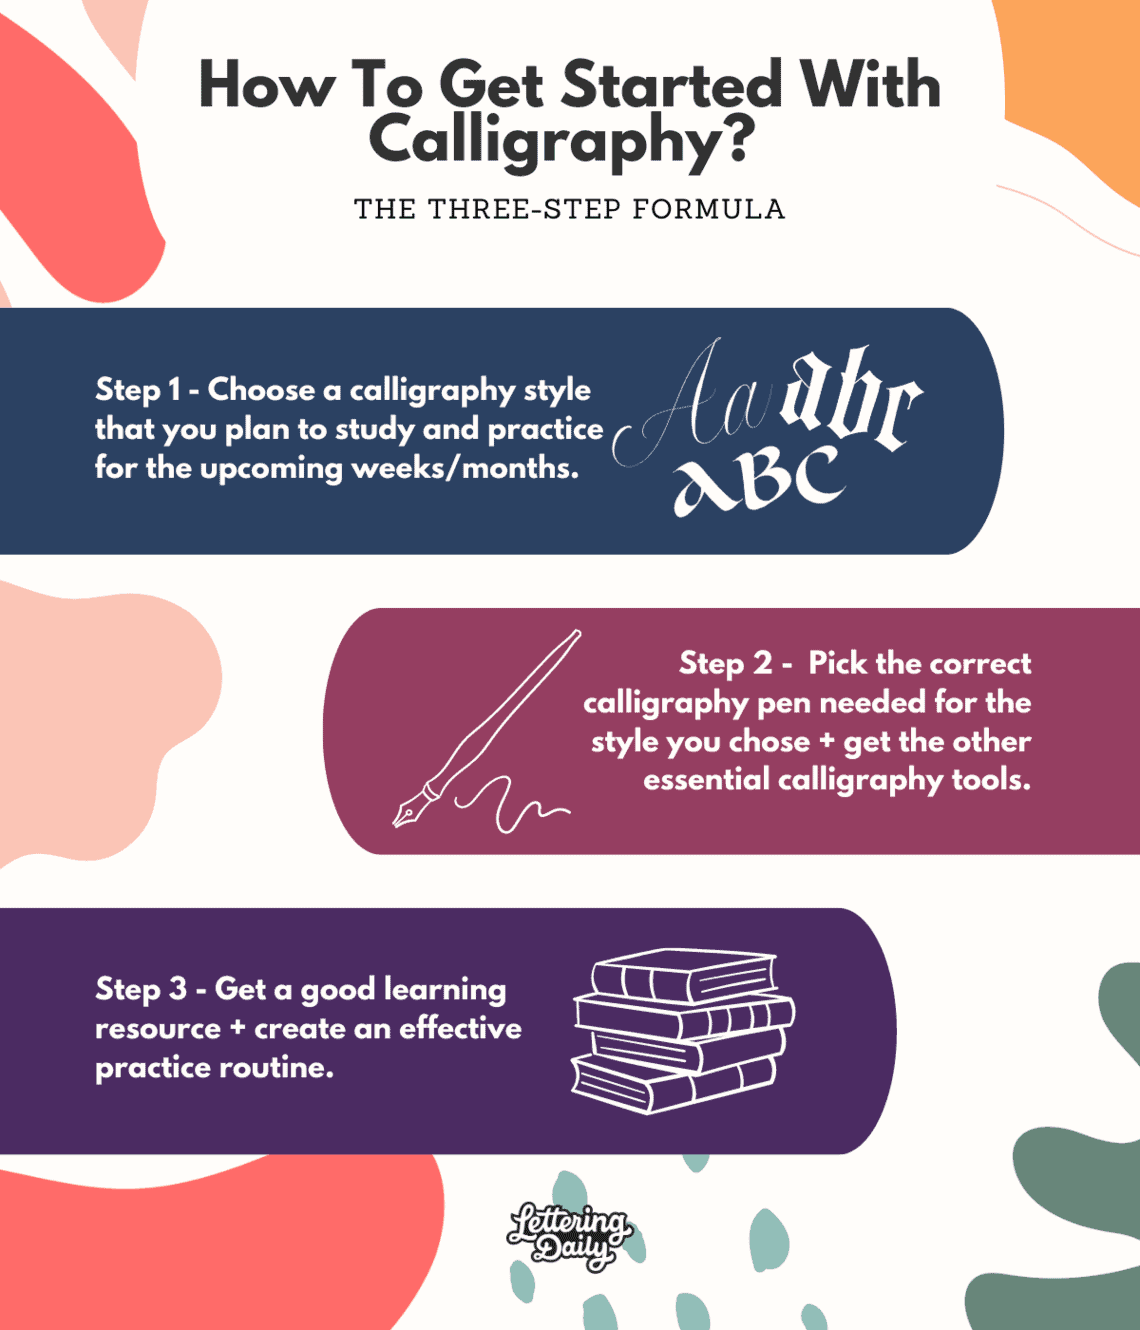
After nearly a decade of teaching, I’ve developed a foolproof 3 step formula that will help you learn calligraphy quickly and with confidence.
✔ Step 1: Pick the right calligraphy style (Start with these 10 popular styles).
✔ Step 2: Choose the right pen (I’ll show you exactly which one to get).
✔ Step 3: Follow a structured practice plan (With the best resources & worksheets).
No guesswork. No overwhelm. Just a simple, proven system to get you writing beautiful letters fast. Let’s dive in!
This article is part of my Calligraphy Hub, where I’ve gathered foundational guides, tools, and creative inspiration to help you grow your skills.
But wait!
Before I begin, let’s clear up one of the biggest misconceptions: calligraphy is not the same as hand lettering.
Calligraphy is about writing with controlled strokes, while hand lettering is about drawing letters.
Many beginners confuse the two, but knowing the difference is essential and it will help you choose the right tools and learning path.
👉 Want a full breakdown? Check out my in-depth guide: [Hand Lettering vs. Calligraphy: What’s the Difference?]

📌 Step 1: Choose Your Calligraphy Style
Ok, let’s begin.
Before you start practicing, the first thing you need to decide is which calligraphy style you want to learn.
In case you didn’t know calligraphy is an umbrella term with A LOT of different styles sitting underneath it.
🔹 Why does this matter? Because your script choice determines your tools. Different styles require different pens, strokes, and techniques, so choosing one upfront makes learning smoother. Also, it’s easier if you focus on a single style for the beginning rather than trying to learn multiple calligraphy styles all at once.
💡 Which Calligraphy Style Should You Choose?
The best style to start with is the one that excites you the most—you’ll be more motivated to stick with it. However, some styles are easier for beginners than others.
📌(See a full breakdown in my [10 Best Calligraphy Styles for Beginners] guide!)
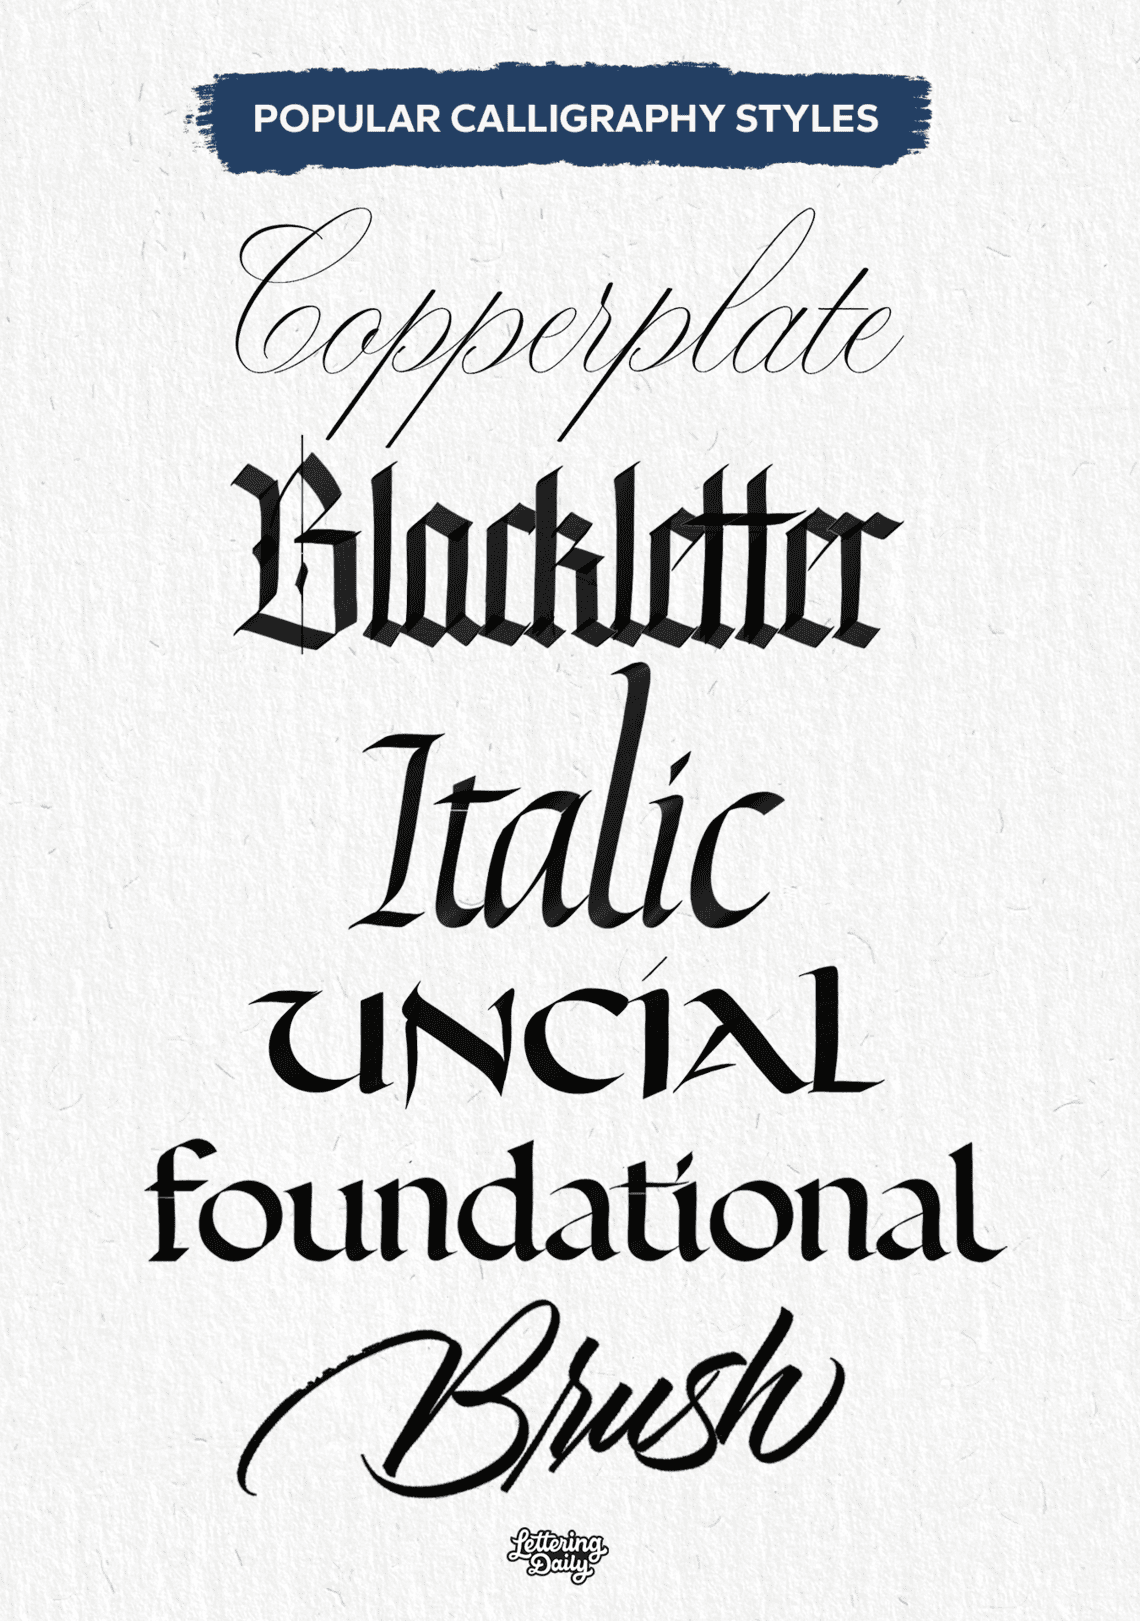
Quick Tip: I often get asked what is the easiest calligraphy style to start with, and the truth is that each style has its little nuances that will create challenges along the way. Try a style that visually appeals to you and stick with it for a while.
💡 Important Terminology: The correct term is calligraphy script, not calligraphy font. Fonts are computer-generated text styles, while scripts are hand-written.
📌 Step 2: Choose the Right Calligraphy Pen & Tools
Once you’ve picked a calligraphy style, the next step is choosing the right pen (as well as other essential calligraphy tools) – because not every pen works for every style.
🔹 Why is this important? Picking the wrong tools can lead to frustration, wasted money, and poor results. But don’t worry – I thought about this as well, and I got you covered.
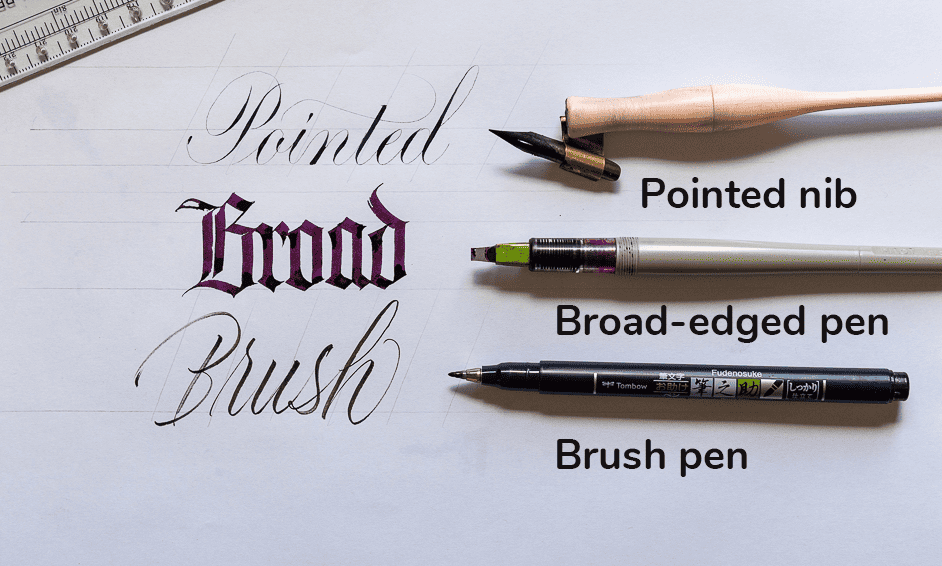
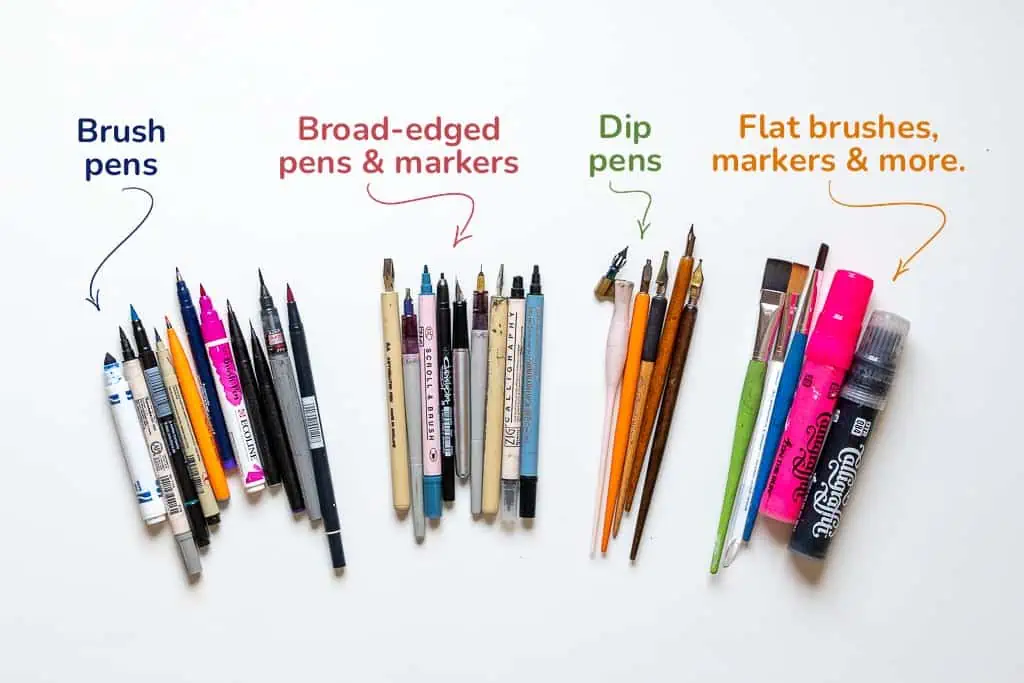
🖋 The 3 Main Types of Calligraphy Pens
💡 To simplify things, calligraphy styles are grouped by the type of pen you use:
1️⃣ Pointed Nib Pens → For Copperplate, Spencerian, and Modern Calligraphy
2️⃣ Broad-Edged Pens → For Gothic, Uncial, and Foundational scripts
3️⃣ Brush Pens → More relaxed, modern calligraphy styles
And the best part?
You only need one pen to get started.
Of course there are a ton of choices from different brands, but lucky for you I spent years trying them all. In case you’re not sure which one to pick – Read my [Complete Guide to Choosing the Right Calligraphy Pen].
🛠 Essential Calligraphy Tools for Beginners
Aside from your pen, you’ll also need a few basic supplies:
✔ Calligraphy Pen (Dip pen, brush pen, or fountain pen)
✔ High-Quality Paper (So your ink doesn’t bleed)
✔ Ruler & Pencil (For layout & guidelines)
✔ Eraser (For sketching & corrections)
✔ Calligraphy Ink (If using a dip pen)
📌 Want a full breakdown? Check out my [Beginner’s Guide to the 6 Essential Calligraphy Tools].

🆘 No Calligraphy Tools? No Problem!
If you don’t have access to calligraphy tools, you can still get started:
✔ Faux Calligraphy → Learn how to create calligraphy using a regular pen.
✔ Pencil Calligraphy → Yes, you can do calligraphy with just a pencil!

If you want to learn more about calligraphy tools, check out some of my other articles on various topics about tools and supplies.
- Calligraphy Paper – The Ultimate Guide For Beginners
- 10 BEST Brush Pens For Calligraphy Beginners
- How To Clean Your Calligraphy Nibs (5 EASY Ways)
- How To Make A Calligraphy Pen At Home
- Lettering & Calligraphy Gift Ideas (The ULTIMATE Guide)
📌 Step 3: Find the Right Learning Resource & Build an Effective Practice Routine
The final step is to find a proper resource and start practicing which personally I believe to be the most important step.
🔹 But here’s the problem: You could have the best tools and supplies but without a good learning resource and practice routine, you won’t be able to gain much progress.
If you practice using incorrect letterforms or bad technique, you could spend months reinforcing bad habits.
That’s why you need a structured, high-quality resource to guide you.
📌 The Best Ways to Learn Calligraphy (With Free Guides & Worksheets!)
There are several ways to properly practice and learn calligraphy, but the best method depends on your learning style and access to resources. Here are some of the best methods in my experience.
✔ 1. Step-by-Step Online Guides (Free & Structured)
I spent years building up my resource library with dozens of step by step tutorials on how to get started with the most popular calligraphy styles.
I think these are great if you prefer self-paced learning. You’ll find that most of these tutorials come with free downloadable calligraphy practice sheets.
📌 Start with one of these step-by-step guides:
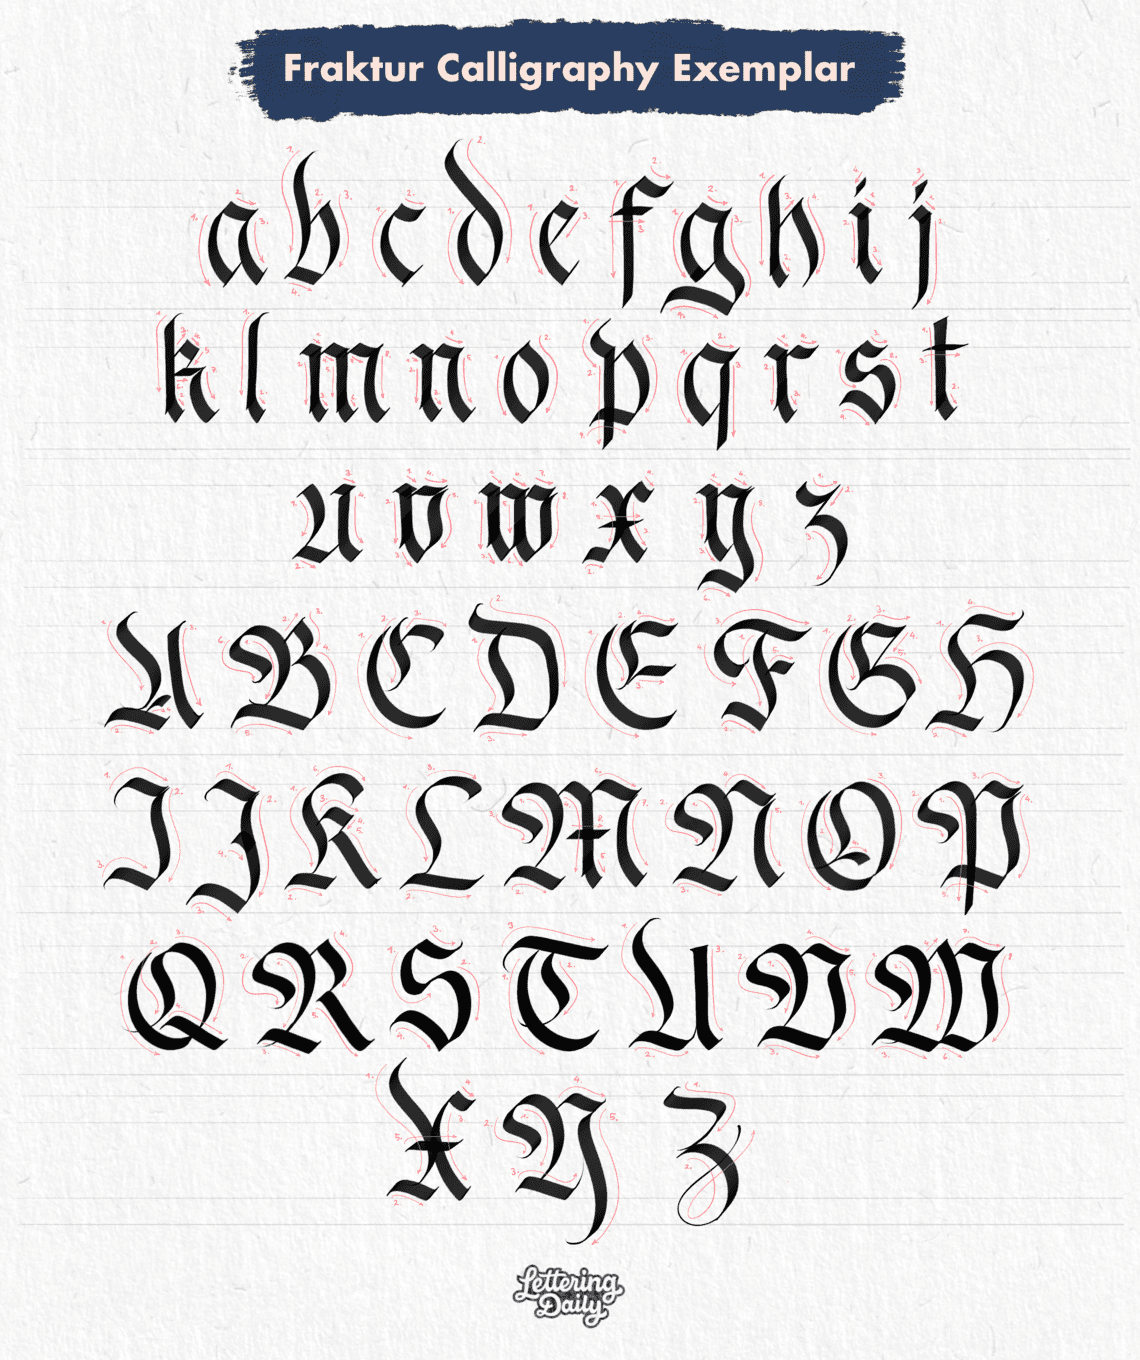
- Blackletter/Gothic Calligraphy For Beginners (+FREE Worksheets)
- Fraktur Calligraphy Tutorial for Beginners (+FREE Worksheets)
- Italic Calligraphy For Beginners (+FREE Worksheets)
- Copperplate Calligraphy For Beginners (+FREE Worksheets)
- How To Get Started With The Foundational Hand (+FREE Worksheets)
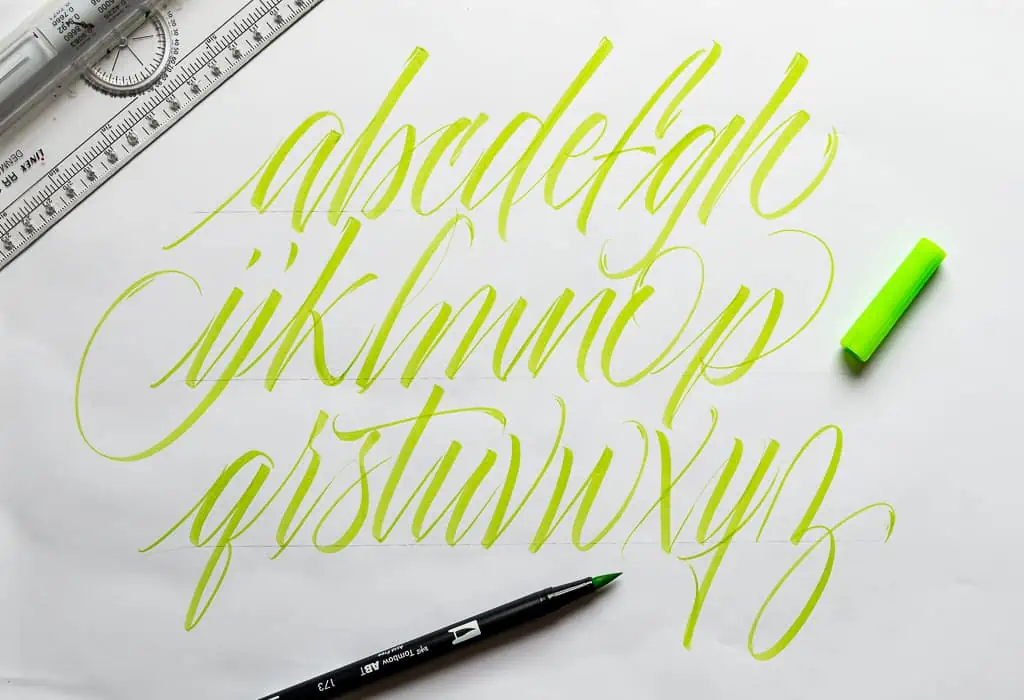
- How To Do Modern Calligraphy (+FREE Worksheets)
- Brush Calligraphy Alphabet – a to z (Lowercase Letters)
- How to Do Faux Calligraphy (+FREE Worksheets)
- How To Do Pencil Calligraphy For Beginners (+FREE Worksheets)
- How To Get Started With Dip Pen Calligraphy (+FREE Worksheet)
- How To Do Calligraphy With Crayola Markers
- How To Draw Illuminated Letters
- How To Improve Your Handwriting (+FREE Worksheets)
✔ 2. Learn from a Calligraphy Workshop (Online or In-Person)
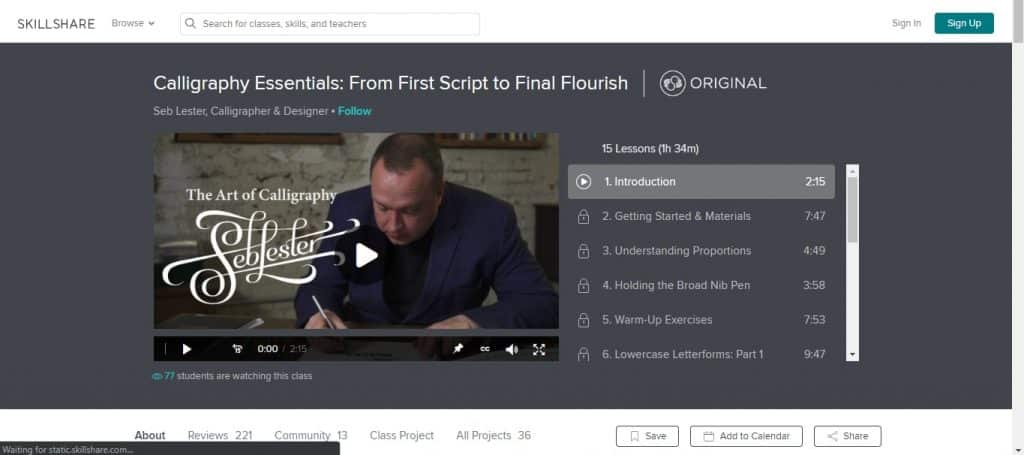
If you learn best with real-time instruction, consider attending a workshop hosted by a professional calligrapher.
For example, Domestika and Skillshare offer some great online courses to help you start your calligraphy journey.
I also wrote an article sharing some of my favorite online calligraphy courses.
I prefer live or online workshops over courses (even if they are more expensive) because you can interact with the teacher, ask questions and get detailed feedback on your work.
✔ 3. Calligraphy Books for Deeper Learning
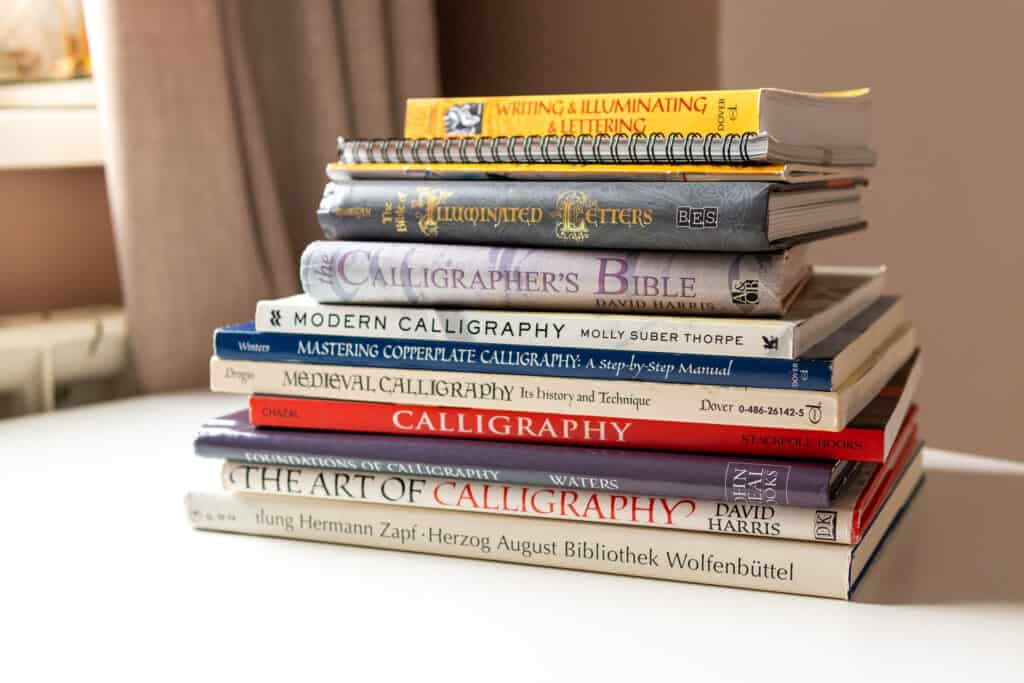
Some of the best structured learning resources come in book format. Some of my top recommendations are:
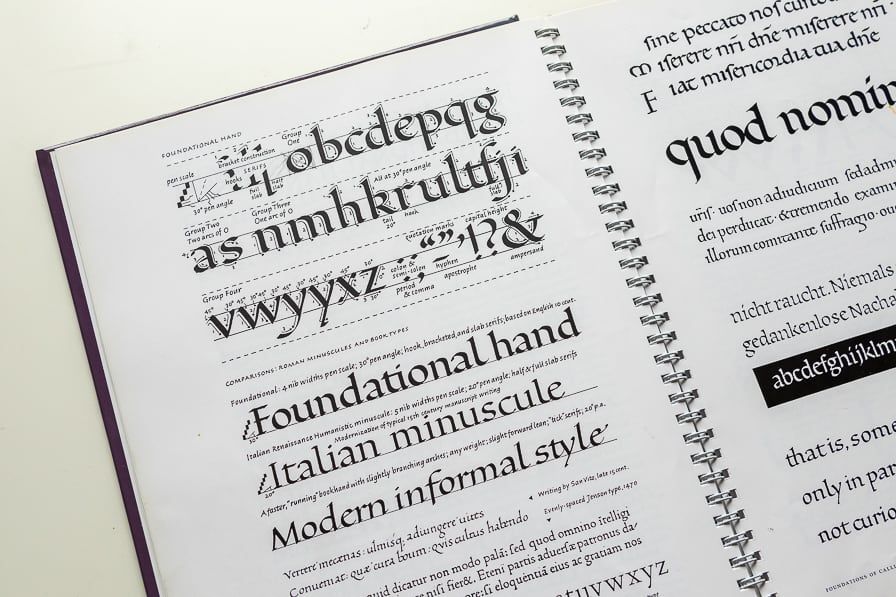
- 📖 Foundations of Calligraphy by Sheila Waters (Perfect for both beginners & advanced calligraphers).
- 📖 The Calligrapher’s Bible by David Harris (Great overview for both beginners and more advanced calligraphers)
- 📖 Calligraphy – A complete guide by Julien Chazal (A very nice and in-depth overview of the most popular scripts)
📌Be sure to check out the full list of my favorite calligraphy books – 10 best calligraphy books for beginners
I created this workbook to help others avoid the trial-and-error I went through when learning brush calligraphy.
If you’re ready to start with confidence, From Strokes to Style is for you.
Master Brush Calligraphy
One Stroke at a Time
This 100+ page workbook walks
you step-by-step through brush
calligraphy basics to full style
development – no experience needed.

✔ 4. YouTube Tutorials & Social Media Learning
Platforms like YouTube and Instagram can be great for inspiration, but be careful—not all tutorials provide correctly structured exemplars or proper stroke order.
Obviously I’m linking to my YouTube channel but here are some other channels that will provide your with great calligraphy resources –
- Calligraphy Masters
- Paul Antonio – PAScribe
- Kelly Creates
- Blackletter Foundry
- Made By Edgar
- Loveleigh Loops
- Vivian Uang
- Logos Calligraphy
- The Postman’s Knock
❌ Why You Should Avoid Random Alphabets from Pinterest & Google
You might think, “I’ll just copy alphabets I find online.” But this approach can cause more harm than good if the letters aren’t properly structured.
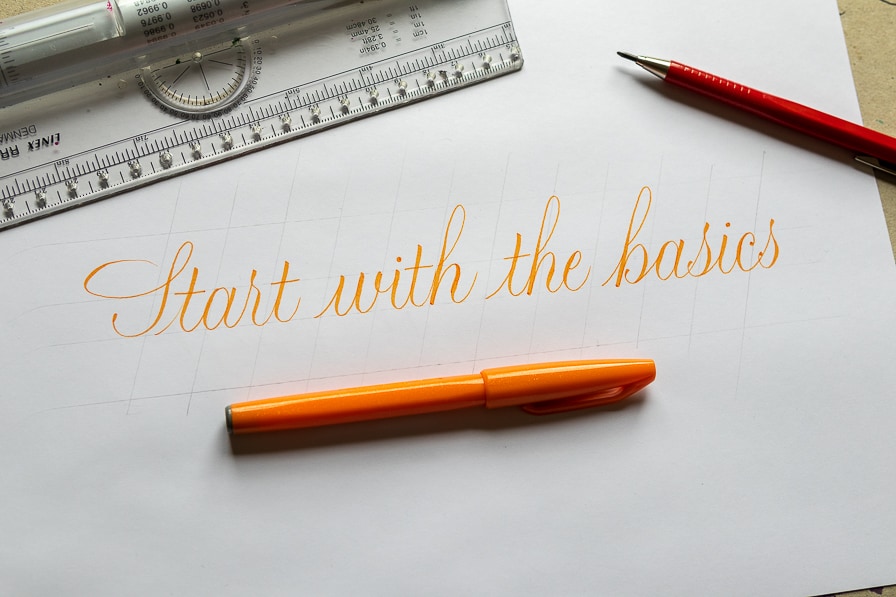
A high-quality calligraphy exemplar should include:
✔ Stroke order & direction (Ductus) to ensure correct technique.
✔ Consistent proportions so your letters look balanced.
✔ Spacing guides to keep your work neat and professional.
You can find these proper exemplars in the resources I linked above. Don’t just focus on consistent practice, focus on having a good quality practice while you do it.
📌 How to Create an Effective Practice Routine
Calligraphy is a motor skill, meaning your muscles, brain, and nervous system all need to work together.
🔹 This means: The more you practice, the better your hand-eye coordination and pen control will become.
But it’s not just about practicing a lot—it’s about practicing the right way.
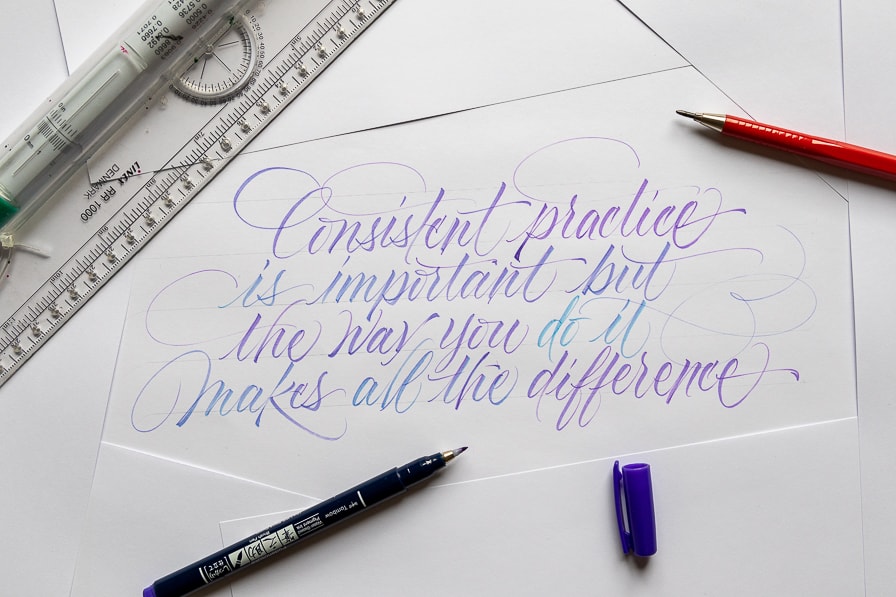
If you’ve been reading my articles or will be reading them, you will often see me repeat the following sentence: Consistent practice is important, but how you practice makes all the difference.
📌 Here’s how to structure your practice for maximum improvement:
✔ Practice regularly (even 15–30 minutes a day beats a long session once a week).
✔ Use structured exercises (instead of randomly writing alphabets).
✔ Focus on quality over quantity (slow, precise strokes > rushing through pages).
✔ Challenge yourself (increase difficulty gradually—don’t just repeat easy strokes).
✔ Make it fun! (Rigid, boring practice leads to frustration—find ways to stay motivated).
📌 Want a complete practice plan? Read my [How to Practice Calligraphy Effectively] guide!
Maybe this is not super related to calligraphy but it is a great video that truly helped me put in perspective the quality of practice. I thought that if it helped me, it would help you as well!

Advanced calligraphy techniques and effects
Once you have covered the calligraphy basics, you can start experimenting with more complex effects and techniques.
However, it is crucial that you go over the basics before you try different techniques and effects.
Below you can see a list of various tutorials and guides for calligraphy techniques and effects you can add to your work :
- How To Add Shadows To Your Letters (5 EASY Ways)
- How To Do Calligraphy Flourishing (+Free Worksheets)
- How To Dry Emboss Your Lettering By Hand
- Color Fundamentals, And How To Use Them In Your Lettering
- 5 Ways You Can Add a Gradient To Your Lettering
- How To Make A Calligraphy Pen At Home
- How To Vectorize Your Hand Lettering (4 EASY Steps)
- How To Create A Calligram (Step-By-Step Tutorial)
- How To Create Brush Lettering Compositions With Ease
- How To Become Ambidextrous (Beginners Guide 2023)
- How To Do Water Brush Lettering (+FREE Worksheets)
Frequently asked questions about calligraphy
Here are some questions (and answers) that I get from calligraphy beginners :
📌 Recap: Your First Steps in Calligraphy
That’s pretty much it folks, let’s do a quick sum up of the whole thing.
To start learning calligraphy the right way:
1️⃣ Choose a style that excites you—this keeps you motivated.
2️⃣ Get the right pen and tools—so you don’t struggle with the wrong supplies.
3️⃣ Follow a structured learning resource—to avoid bad habits and improve faster.
4️⃣ Create an effective practice routine—consistency is the key to progress.
Once you’ve built a strong foundation, you can explore advanced styles, techniques, and flourishes to take your calligraphy even further.
💡 Remember: Calligraphy is an art form that takes time to master, but getting started should be simple. If you follow this guide and stay consistent, you’ll see real progress sooner than you think!
📌 I’d Love to Hear from You!
What inspired you to start learning calligraphy?
Which style are you most excited to try first?
👇 Drop a comment below and let me know—I’d love to hear about your calligraphy journey!
Until next time, happy lettering!
Pin me!

Stay updated with my tutorials and get instant access to the Lettering Crate –
A growing library of free lettering & calligraphy resources that includes –
About the author

Hey, I’m Max. I’ve been drawing and messing around with letters since 2011. I don’t have a formal art degree—my background is actually in the kitchen as a former chef and on the streets painting graffiti with my friends. Over the last decade, through a ton of trial and error, I somehow turned that obsession into a full-time gig. These days, I design custom logotypes for global brands and paint large-scale murals. I started Lettering Daily just to create the kind of honest, no-BS tutorials I wish I’d had when I was starting out. Stick around, and let’s draw some letters.

Just wondering if you were left handed can you use a straight calligraphy pen
Also is getting ink on the pen easy or can you get to much on and have a dripping mess
Been using a brush pen ,I’d like to use ink
Thank you for all the advice
Paula
Hi Max!
Thank you so much for writing this guide! I’m just starting out in calligraphy (Have my first in person class on Wednesday) and I’m really excited about it! Hoping to turn it into a career as I’m passionate about arts/ crafts and I think this is the perfect avenue to hone into as I’ve been writing cursive my whole life and I find calligraphy so beautiful, hoping to turn my cursive into calligraphy 🙂
Thanks a lot! Thank you for making this free for all of us!
Thank you for this guide. I’m absolutely over joyed. I wish I could print this guide.
My Uncle was a Calligrapher in the US Navy. His letters to home are so beautiful. Which style would he have used? He said that he translated important papers for the President.
Max, this is a brilliant and comprehensive guide not just for beginners, but also for those of us who are still on the journey to beautiful writing. I started practicing calligraphy as a movement meditation to help manage stress, something I can do for myself to help with my well being. Thank you for your work and generosity in sharing knowledge and resources to further the calligraphic and lettering community.
Thank you for all the content you have created and I look forward to what’s next. I love writing poems and I always thought poems look so boring on paper because I am not very good at drawing. So at a very young age I started to obsess over pretty writing, that’s how I came to my obsession with dip pen calligraphy. I love copperplate and spencerian
Hey Jillian, thank you so much for the kind comment 🙂 Would love to see some of your Copperplate and/or Spencerian.
Thanks Max for your newsletters and for this Calligraphy 101 Guide, plus all the extra topics and articles.
Something you could put in your newsletter is where you get your calligraphic supplies and books from–Amazon, local art store, etc.
Typism 2023 starts next week. I wonder if anyone is going to teach a class geared toward calligraphic art, mementos and such, for the 2024 Paris Olympics? (hopefully, the civil unrest will get settled). I took Natalie Brown’s Greeting Card 101 class, Typism 2022. Nice class, but am having difficulty with understanding PS/AI Pen Tool technique in order to vectorize my art, so it can be sent to a publisher. I’m getting help though.
Bruce, North Carolina, US.
Hey Bruce, thank you so much for the suggestion. I have all those links on my site, but I will include them in my next newsletter as well. Shoot me an email, and i’ll send you some great resources that will help you with manual vectorization of your calligraphy. It’s not the easiest skill to learn but also not the hardest one. It just takes practice.
Thank You very much for this article, is a lot of very interesting information.
Regards,
Jose
Thank you for the nice comment, Jose. I really appreciate it! 🙂
Hello Max,
This is an excellent resource for, in my opinion, calligraphers and lettering artists at all levels, from beginner onwards. Thanks for for the all the work you put into it — I know that I’ll come back to it often.
Drew
Thank you so much, Drew. I am happy to hear you think that about my article, it really means a lot! 🙂
Hi there,
Your emails and articles are very interesting and informative. I appreciate all the work you put into them. You must be a workaholic. 🙂 Nonetheless, I decided to get into calligraphy because it is a beautiful art form of conveying messages and I would like to give scripture messages using calligraphy as gifts to friends and family. I haven’t decided what style I will be using yet. However, I do like the templates you provided for your faux calligraphy fonts and I have been using that since I signed up with you. I have been painting them in gold. Thanks again for your sharing and generous spirit. God willing it will pay off.
Hey Lorraine, thank you so much for the awesome comment 😀 I used to consider myself as a workaholic before but now i think i have more work/life balance. I just enjoy doing this so i dont necesarily consider it as conventional work 😀 Faux calligraphy sounds awesome! Let me know if you ever struggle with something, always happy to help.
Max, you are a wonderful human being! Again, you have provided fabulous information (free!) for beginning calligraphers and those who want to improve their calligraphic skills. I’m always impressed with the offerings you provide and love to recommend your site to people…they will get quality guidance to steer them in the right direction! Thank you for all you do to promote calligraphy!
Thank you so much, Gail! You are awesome! It really means a lot hearing these things – thank you! 🙂 <3
Excellent resource for beginners or those wishing to advance their skills or expand their style range.
Thank you so much, Eden. I really, really, really appreciate it! 🙂
Damn, son, what a resource! I love the infographic and the other illustrations. Keep this gold coming. 🔥🔥🔥
Muchas gracias chica 🙂 I really appreciate it 🙂
What a wonderful Masterclass. The most in depth Calligraphy guide I’ve ever seen. Hats off Max!
WOWOWOW! Thanks so much bro! 🙂 Means a lot to hear that from you.