
In this article, I will show you the essential calligraphy tools you need to get started with the art of calligraphy.
These tools are needed for any calligraphy style you choose to study and practice.
Here I want to show you that you just need a few tools to get started and don’t need to spend a lot of money to get good quality tools.
I will explain why we use each individual tool, and then I’ll give you my recommendations.
Without any further delays, let’s get started!
Want to explore more? Head to the Calligraphy Hub where I’ve organized tutorials, styles, and resources for all levels.
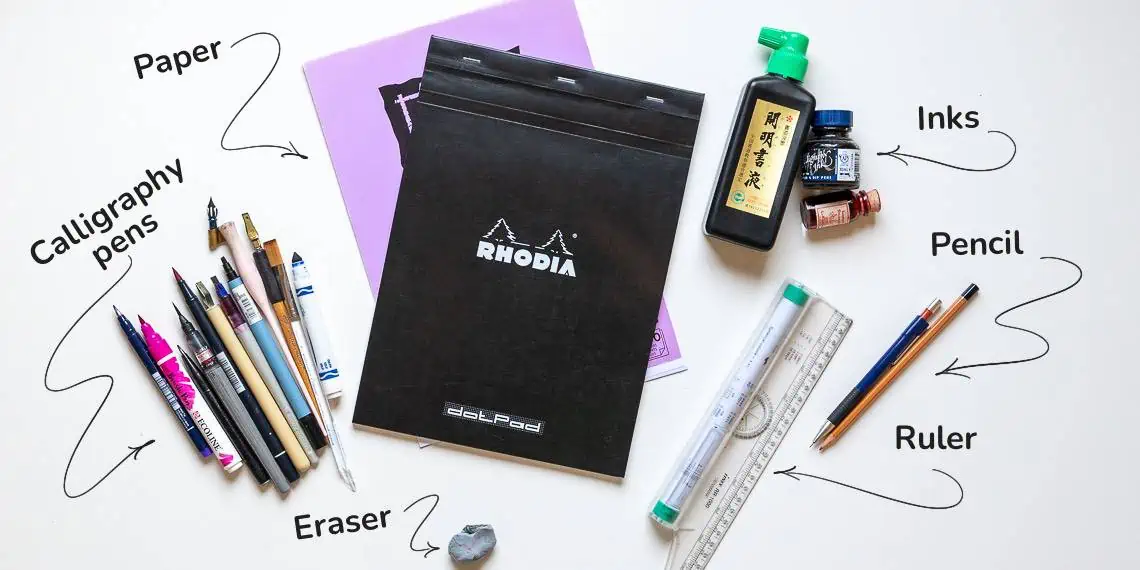
Here are the 6 essential calligraphy tools –
- Calligraphy Pens
- Paper
- Ruler
- Pencil
- Eraser
- Inks

Now, Let’s look closely at each of these individual tools.
Note – If you’re just getting started with calligraphy, I highly recommend you check out my ultimate guide for calligraphy beginners.
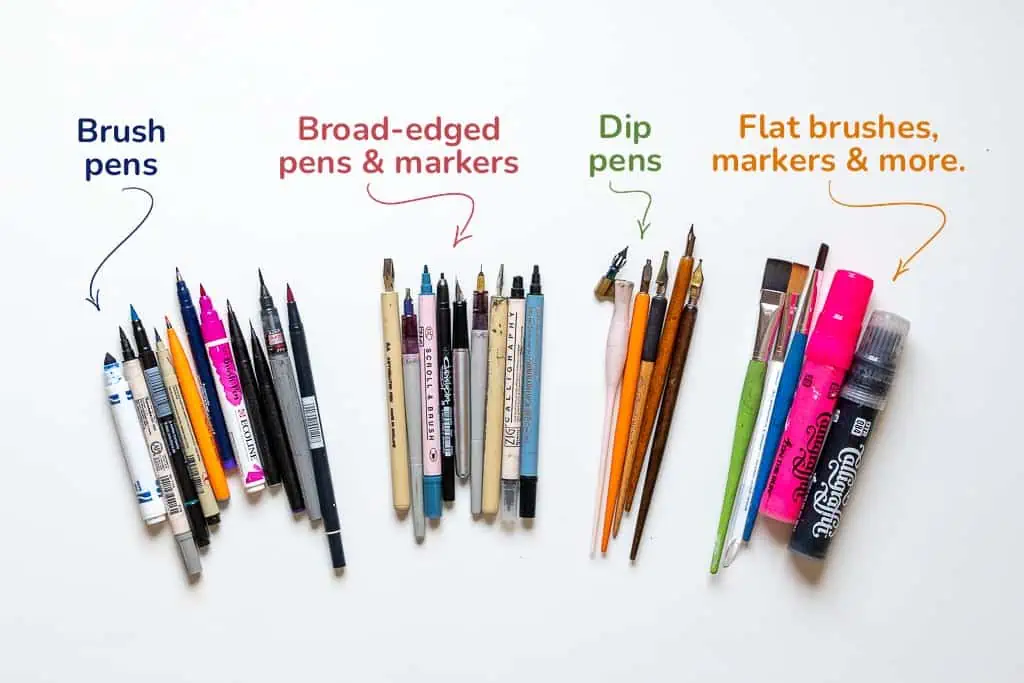
1. Calligraphy pens
Number one on our list of essential calligraphy tools is – calligraphy pens.
It’s crucial to understand that calligraphy is an umbrella term that encompasses various styles.
And as you can imagine, these calligraphy styles require different pens.
For this reason, I created a separate, in-depth guide on the best calligraphy pens for beginners.
So, if you’re new to calligraphy, here’s what you should do –
- First, pick a style that you’re interested in learning,
- Based on that style, choose a calligraphy pen that suits that style.
Otherwise, you might purchase a pen that isn’t suited for the style you’re interested in learning.
You will find all the answers to your questions in the calligraphy pens guide I mentioned earlier.
2. Calligraphy paper
I could talk about paper for hours.
That’s why I wrote a separate guide on the best calligraphy papers.
But since you’re already here, I’ll give you a brief version of the topic.

Not every paper will work with every tool.
That’s why it’s essential to first pick your calligraphy pen and then, based on that, get the proper paper.
The other important distinction is –
- practice paper
- and paper for final artworks
We use nicer and usually more expensive paper for final artwork.
When it comes to calligraphy practice, we are looking for the best bang for our buck.
My preferred paper for practice is the Canson Marker paper.

It works great with most calligraphy pens.
It’s the best paper for brush pens and also handles perfectly the heavier ink flow of the Pilot Parallel Pen.
For brush pens, it’s crucial to get smooth paper.
However, even if a type of paper is smooth to the touch, it doesn’t necessarily mean it’s suitable for your brush pens.
Your touch might not recognize the little paper fibers, but trust me, your brush pens will.
Which will inevitably result in frayed tips as well as faster ink consumption.
That is precisely why the bleed-proof marker paper is my top choice.
A cheaper alternative would be the HP 32 Premium paper.

Unfortunately, that’s not bleed-proof paper, and with time it will reflect on your brush pens.
However, it’s still paper of great quality, considering how much it costs.
Rhodia paper is also excellent for practice.

It comes in a variety of sizes and patterns on sheets. Lines, grids, dot grids, etc.
If you plan to practice calligraphy using just a pencil, you can use the cheapest print paper you can find.
If you’re looking for some nice paper for the final artwork, here is what I recommend –

3. Ruler
The most common use for the ruler will be for creating calligraphy guidelines.
I created a separate in-depth article about what calligraphy guidelines are and how you can use them to improve your calligraphy.
If you’re new to calligraphy, I HIGHLY recommend reading that guide, as it will instantly help you improve the consistency of your calligraphy letters.

If you’ve been following my content for a while, then you know that the one ruler I constantly recommend is the rolling ruler.
The rolling ruler is like a regular ruler, but it has this cylinder on the back that allows it to roll on the surface.

With the rolling ruler, you can easily and quickly create straight parallel lines.
Which is just what you need to create calligraphy guidelines.
You can also work with a regular ruler or even a t-square ruler.
I also like the rolling ruler because it has a built-in mini protractor.
It is super handy for determining angles for your slant lines.

Once again, if you’re new to calligraphy, be sure to check out the calligraphy guidelines article I previously mentioned.
Aside from guidelines, the ruler is super helpful for creating various layouts and compositions.
4. Pencil
Ah, the pencil.
One of my favorite tools ever.
Cheap, versatile, erasable, yet so underrated.
I love the pencil, and I use it constantly.
Did you know that you can use a pencil to create calligraphy?
And yes, I have a whole separate tutorial on how to create calligraphy using just a pencil 😀

However, the pencil is on this list for two main reasons.
- Guidelines
- Thumbnail sketching
Usually, we use a pencil to create these guidelines because once we are done creating our calligraphy, we can just erase the guidelines.
Aside from creating guidelines, the pencil is super helpful for thumbnail sketching.
Thumbnail sketching is an extremely powerful technique for many art forms, including calligraphy and lettering.
Whether writing out single words or creating intricate calligraphy layouts and compositions, thumbnail sketching allows you to quickly lay down various ideas.

Even if you’re a super experienced calligrapher, you still want to plan out your work, and that’s when thumbnail sketching is extremely useful.
For these two purposes, the pencil I use and recommend is an HB pencil.
Personally, I use a mechanical pencil with an HB lead inside.
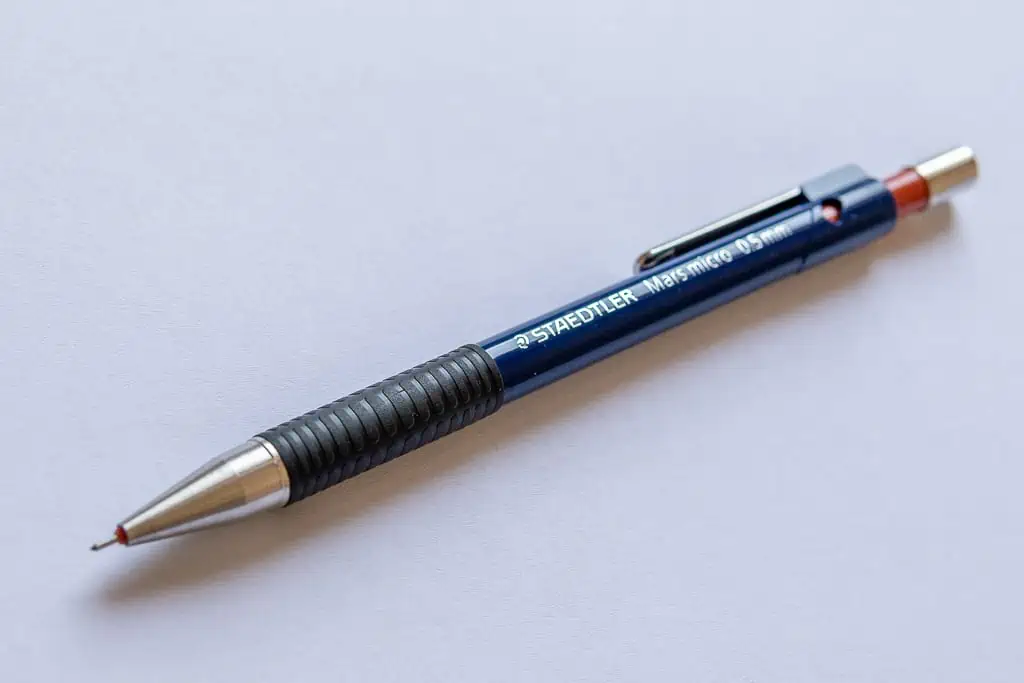
The reason for that is convenience.
I always have a sharp tip and never have to sharpen it.
The HB lead is the one I prefer the most because it’s visible enough and easy to erase once you’re done.
For calligraphy guidelines, I would avoid using any pencil with a mark B or higher, as those are more difficult to erase.
5. Eraser
This one is pretty simple.
You can use any eraser you have or want.
The one I like to use and that I recommend is the kneaded eraser.

It’s a soft, moldable eraser that doesn’t leave any residue after use.
The only downside is that it struggles to remove darker pencil marks.
That’s also the reason why I recommend using an HB pencil.
6. Inks
Calligraphy inks are kind of optional to get started.
For example, if you get a brush pen or a Parallel Pen, you won’t need ink to get started.
If you plan to work with dip pens, you will need ink.
When it comes to inks, there is such a wide choice.
For general purposes, when working with dip pens and nibs, I recommend these inks –
- Sumi ink
- Winsor & Newton calligraphy ink
- Speedball super black calligraphy ink
- Higgins black calligraphy ink
- Daniel Smith walnut ink
- Dr. Ph. Martins bleed proof white ink
- Ecoline watercolor inks are also great for refilling the Pilot Parallel Pen’s cartridges.

Sometimes, depending on the nib or the paper you’re working with, you might need to thicken or dilute the ink.
You can thicken it with gum arabic and dilute it with water.
There is some trial and error involved before getting the right mixture, but don’t get intimidated as it’s not too complicated of a process.
And yet, the results are fantastic!
A great alternative that I also recommend you try out is gouache.

I love gouache because it comes in so many different colors which you can mix and create all sorts of unique shades.
Also, it comes out very thick, so you just need to dilute it with a bit of water.
I like the Winsor & Newton gouache, but you can also check this one by Arteza.
Wrapping it up, final words.
And there you have it, folks.
These are the 6 essential calligraphy tools you should have to start learning and practicing the art of calligraphy.
As I mentioned, you can easily expand your toolbox with time.
There are so many great tools that are unique in their own way.
A common mistake I see beginners making is spending 30-40$ on premade kits from Amazon.
On the surface, they might look like fancy calligraphy kits worth the price, but trust me, they are not.
There are just a few kits out there that I would feel comfortable recommending to beginners.
Honestly, once you know why we use these essential tools from the list, you’ll be able to assemble your own kit, which is cheaper and of much higher quality.
If you’re interested in learning more about calligraphy, check out my article on the 10 calligraphy styles for beginners.
Now, let me ask you – what is your favorite calligraphy tool? The one thing you couldn’t do without? Or perhaps, the tool that helped you the most in your calligraphy journey?
Be sure to let me know by dropping a comment below.
Until the next one,
Stay AWESOME!
Pin me!


Stay updated with my tutorials and get instant access to the Lettering Crate –
A growing library of free lettering & calligraphy resources that includes –
About the author

Hey, I’m Max. I’ve been drawing and messing around with letters since 2011. I don’t have a formal art degree—my background is actually in the kitchen as a former chef and on the streets painting graffiti with my friends. Over the last decade, through a ton of trial and error, I somehow turned that obsession into a full-time gig. These days, I design custom logotypes for global brands and paint large-scale murals. I started Lettering Daily just to create the kind of honest, no-BS tutorials I wish I’d had when I was starting out. Stick around, and let’s draw some letters.

Also, one thing do kneadable erasers don’t pull off ink if used upon the inked piece? As I’ve normal erasers and they pull off ink from my pieces and I just get sad. 🙁 Some of the pencil sketch keeps showing from sides etc and it’s very annoying if i leave it be.
It even pulls off uniball pen’s ink which sometimes I use on my pieces.
It does, but not too much. If you use the pencil heavily, I recommend getting a light tablet. It’s a great (cheap) investment 🙂 This way you can avoid erasing all together.
Such a precise guide for beginners. Thankyou so much and yes, my favorite tool is pencil . However, all types of pens and nibs attract me and I’ve got almost one of each . MY ink collection is just local fountain pen ink , would it be ok for practicing or would it ruin my dip pen nibs or flat pilot pens?
Thank you so much, Mariam! I know what you mean. I also have a bunch of tools, and I want to get more! 😀 Don’t worry, the foundation pen ink wont do any harm to your nibs and Pilot pens. Make sure to clean them properly after you use them. Especially the nibs.
Thank you, Max! Always happy to see you in the inbox! Question: when you begin to do that one final iteration of your beautiful lettering, has it been done in pencil first? Or perhaps, rendered in pencil and then inked over? Or are you so skilled that after a few practice runs, you can simply set down and do something in ink on the good paper?
I have found that if I do enough practice (as though I were creating for publication) that eventually, I will be happy with my work! Best regards!
<3
Hey Linda, thank you for the kind comment. Always a pleasure to hearing from you 🙂
To answer your question – yes and no, but mostly yes. The secret to a great piece if great planning. The best way to plan is always with a pencil. Even if it’s a single word, but especially if you’re working with multiple words creating a composition and layout. Sometimes I let loose and just follow the hand, but you don’t get the desired result right after the first attempt. Inking a lettering sketch is more related to hand lettering than to calligraphy. Calligraphy is solely about writing. In the early stages it will take you more attempts and more sketches and planning. With time, as you train your eye (as well as the hand) you’ll recognize the good and the bad elements, and you’ll be able to sort them out much faster. Essentially it’s not about being fast. If it takes 3 days to create a good piece then so be it. Don’t focus on how much it takes, focus on creating something good. If you have any other questions, please let me know 🙂