You’ve probably noticed the increase of popularity with chalk lettering all over the internet.
Artists across the globe started creating insane chalk lettering masterpieces and also many bars, restaurants and other business started to use it in order to step up their visual representation.
Now ,you have the opportunity to learn it from a real professional, and not only to expand your knowledge and skills but also to start monetizing your hand lettering skills.
My good friend Jimbo has crafted a 7 step -by-step tutorial that will teach you from start to finish on how to create hand lettering with chalk.
Here is a quick overview of what you will be learning today –
- Needed tools
- Creating a concept – finding the proper layout
- Preparing your chalkboard
- Transferring your sketch to the board
- Adding thickness and contrast
- Filling and details
- Illustrations – to reinforce the message

Hi guys!
My name is Jimbo, and today I’m going to be teaching you how to do lettering on a chalkboard.
Sounds good right?
Obviously, this is not a universal method since every artist has their own way to work.
Although, after working on a bunch of chalkboard pieces, these are the steps that helped me step up the game and work for clients worldwide.
Let’s begin.
The first thing you’ll have to do is a really obvious one: Get a surface to work on!
Here are a few different ideas on how to get or even create a chalk board (depending on your preferences)
- Use chalk paint on a surface. I use a brand called Tafel:
- Use chalkboard contact paper and stick it on a surface. VersaChalk has an awesome one!
- Buy a little chalkboard of any size. The ones used in bars and coffee shops have a good size to get you started.
What I’ve done in this case is to get a 5mm wood surface from a local Carpenter and painted it with Chalk paint. Make sure you paint the surface twice so the paint sticks 100%.
You can also paint a wall from your house so you don’t have to move the board all the time.
Ask your Landlord first!
Now that you’ve got the board to paint on, let’s introduce what materials you’re going to use.

As you see in the picture above, you’re going to need:
- – Notebook or a4 paper
- – Pencil and eraser
- – Masking tape (optional)
- – Ruler (optional)
- – Wet rag
- – Chalk. I use a “Eberhard Faber” square shaped chalk. You can also use rounded chalk but I prefer square ones.
Nothing fancy as you see
Step 1 – Coming up with a concept
The meaning of your lettering is the most important part and this took me a while to comprehend.
When I started writing letters (back in 2014) I was focusing more on the shape of the letters than trying to communicate a message.
My artworks weren’t engaging at all and I started getting frustrated until I figured out that I had to
Relate to my audience.
Words are made to spread a message. Make sure you do that!
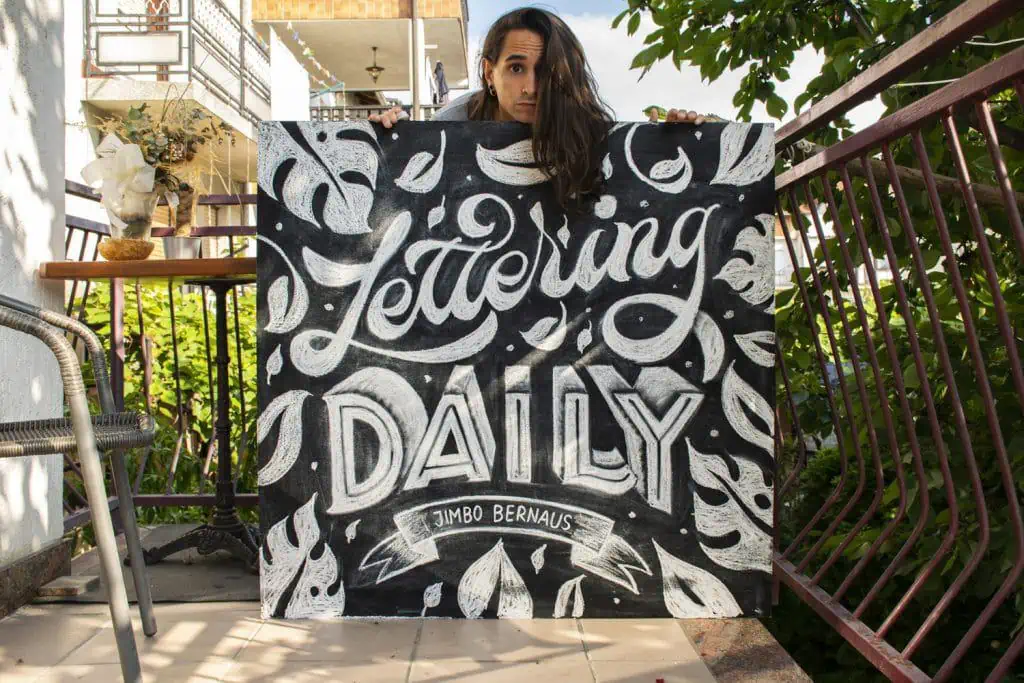
In this case, I’ve lettered the name of the community since it made total sense for the article. I’ve also drawn floral motives as an example of illustration.
If you are hesitating on what to write you can head to my Instagram page and get some inspiration.
Step 2 – Sketch your piece!
– Grab a notebook and write the words roughly (in your normal handwriting)
This is an exercise applicable to any lettering or calligraphy piece. First, you should study the word in order to get familiarised with it and have a better understanding of each single letter.

Once you’ve written the word, count the amount of letters that contains.
After doing this, you’ll know what’s the center of the word and how many letters you have to write.
It will help you control the space and make your life easier from this point on.
Draw small roughs with different compositions.
This is the most important step!
At this point, you’ve already got familiarised with the words. Now it’s time to place them on different compositions.
Check this article if you want to learn 1 awesome tip in order to improve your lettering layouts
DO NOT focus on the detail yet.
Right now you’re just trying to figure out what’s the best composition for your sentence.
Make sure the ratio of the sketch is the same as the chalkboard you’re going to be painting. (In my case square) This way, later on you’ll just have to transfer your sketch literally on the board.
For better practice, draw 6 different structures with shapes (containers) and sketch your words in it to get an interesting composition. (Example in the picture below)

Try different styles and you’ll see what fits the best.
Not every style will work in every composition you come up with.
Whereas capital letters are the easiest to fit in every grid, you will see that sometimes, lower case letters or scripts will force you to use extra space outside the boxes you’ve prepared.
")
As you see, after coming up with several sketches, I’ve decided to use the one that left some empty space for the first and last letter of the word “lettering”.
If you want to use a script, make sure you study which letters have “ascenders” and “descenders” (letters that go up and down) to control the amount of space you’re going to need.
Don’t think of this as a problem. If you locate them in a proper way they will fill some gaps and give consistency to the whole piece.
Once you’ve solved the math, you are ready to draw a
Kickass final sketch!

Once you’ve decided what works the best, it’s time to draw the final sketch.
In this one you’ll have to be clean and make sure you divide the space properly.
By doing this, you’ll save time on doing the chalkboard.
First off, divide the space in halves. You can do that by drawing lines from one corner to its opposite.
At least do that once so you know where the center of the composition is.

Draw the containers followed by the letters and make sure this time you get as close as you can to what you want on the board.

Step 3 – Prepare the chalkboard
If you happen to have a brand new chalkboard, I would suggest you to mess it up a little bit.
Grab a chalk horizontally and paint roughly the whole surface.
After this, grab a wet rag and clean the chalkboard at least once.
This couple steps will make it easier for you to draw on the surface and it will also make your life easier once you want to cover your mistakes later on.
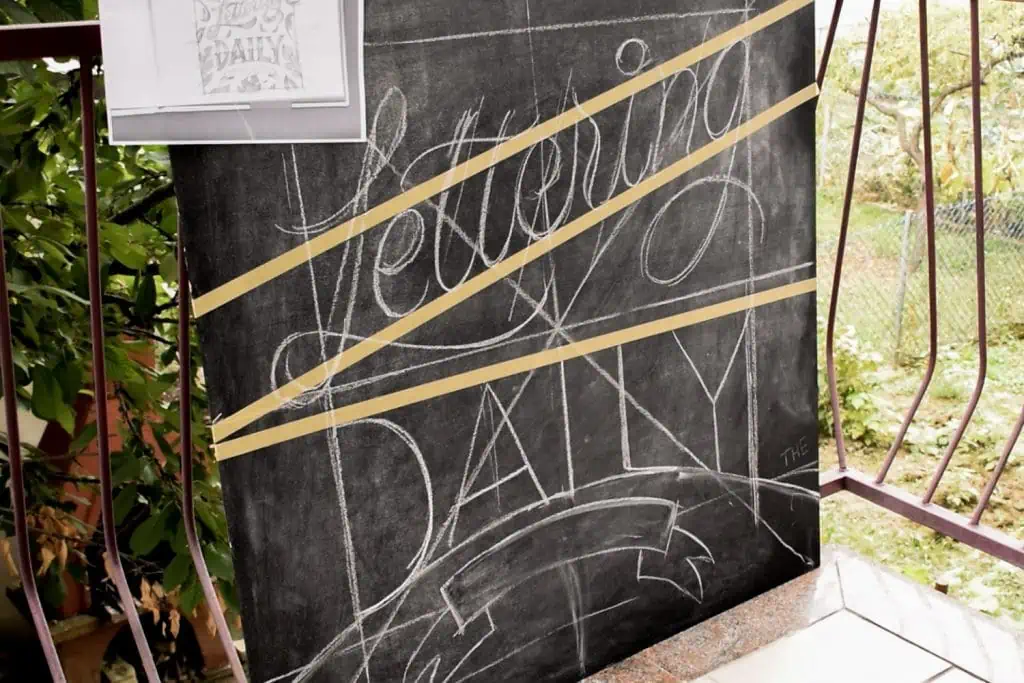
Create guidelines on the chalkboard

Whether you have tape or not, it’s time to divide the chalkboard accordingly to your sketch.
Why do I use tape?
It’s definitely not a must. At @shoutbam we’re always painting big murals and tape makes it easier to divide the space using straight lines.
For such a small chalkboard there’s absolutely no need to use it, but to show you different techniques I’ve decided to divide the space using chalk lines and left the tape just for the containers of the letters.
Step 4 – Place the letter’s skeleton
Tip: Place first the letters located in the middle of the words.
This will help you have a better control and nail the skeleton the first time.
Now that you know what kind of letters you’ll be using, make sure you leave enough space in between all of them.
In the next step you’ll be adding weight to the letters and you don’t wanna run out of space (The famous Kerning)
Step 5 – Add thickness and contrast

We’re getting to the end!
Draw the letters on top of their skeleton. For now, just make the outlines and make sure the rhythm is correct.
What do I mean by rhythm?
To make sure that all the letters of a word make sense as a whole, there’s several things to keep in mind.
I’m not going to walk you through all the rules right now but make sure of the following:
- – The thickness of each letter is the same
- – The contrast is the same (make sure the thin and thick lines are always the same)
- – The height of each letter is the same. Actually by drawing the containers you’ll make sure this happens.
- – The spacing in between each letter is the same (Kerning)
- – The angles. In case your letters are slanted, make sure to keep the same angle in all of them.
Once you have the words written, it’s time to clean up the mess. Get the wet rag and pass it through the lines you want to erase.
Since I have a pretty old chalkboard, I had to do that a couple of times.
Step 6 – Fill up letters and add effects

The reason I told you to just draw the outlines of the letters is because we’re going to fill them up using different methods.
If you want to dig in different effects for your letters you can check our article about it.
For the word “lettering” I just wanted to keep it simple and fill it up normally. This will also give some strength to the word.
For the word “daily” I’ve decided to improvise a little bit and step out from my sketch.
Yes, following your final sketch is very important but sometimes, you realise about certain things once you’re drawing on the chalkboard.
What happened in my case is that I’ve seen there was a little space in between the two words.
So I’ve decided to add a 3D effect on the second word and show in the video how I did the shading in it.

Even though my art teachers told me to never use the fingers to add shadings,
I kept doing it!
I always tend to draw some shading using the chalk and then finalize it with my finger.
It gives a smoother feeling and it also kills some time if you’re in a tight timing.
For the inner lines I used the wet rag and erased the middle part of each letter.
That erased the chalk and gave an extra crisp to the word.

Step 7 – Add details to reinforce the message.

Last thing to do is to cover the empty space or background with little illustrations.
These can reinforce the message or just make the piece more interesting.
Needless to say, adding up doesn’t mean always “getting better” Sometimes the piece just doesn’t ask for it and keeping it minimalist is the best you can do.
And you’re done!
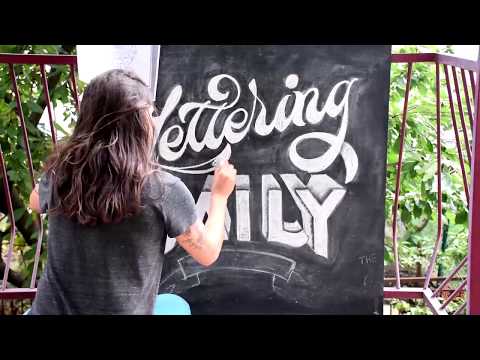
I’ve prepared a little timelapse that takes you through the whole process step by step:
Now we want to see you in action!
Get your tools ready and create some awesome chalk lettering by following the steps above.
Share your work on our website forum and we will be sharing some of our favorites on our Instagram feed!
If you need any questions or help I’ll be more than pleased to give you some feedback!
Thanks a ton for checking this tutorial out and see you in the next one!

Stay updated with my tutorials and get instant access to the Lettering Crate –
A growing library of free lettering & calligraphy resources that includes –
Pin me!
About the author

Jimbo Bernaus is a letterer and visual designer from Barcelona, Spain. After working for different graphic design studios and agencies he and his partner Tea Shockats have founded BAM! a creative studio based in Zagreb, Croatia.
His work has been featured in many international books and well-recognised web pages. At the moment, Jimbo works as an Art Director at BAM! while experimenting on new styles joining his background as a graphic designer with his lettering skills.

This is a great tutorial on chalk lettering….as a formal calligrapher I find it hard to ‘loosen up’ and this has been a help to me.
Thanks for your generosity in sharing this technique.
Happy to hear that! And you are very welcome 😀
I am now following JIMBO BERNAUS on Instagram after discovering him on ‘Lettering Daily’. His work is wonderful & inspirational; I could look at it all day!
Thanks a ton Bessie! Cheers from Croatia!
Jimbo