
Introducing pyrocrafters!
Dear lettering lovers, today we have prepared something really unique and special for all of you!
We want to thank the crafting duo from Prattville, Alabama for contributing to our community, and today they are here to introduce you to the intriguing world of pyrography! (A.K.A. wood-burning)
Aney and Clay will tell you their inspiring and motivating backstory as well as a complete breakdown, step-by-step process of creating a full pyrographic lettering piece.
By the end of this article you will know everything you need to start crafting your own pyrographic journey!
So buckle up because this is about to get hot! (pun totally intended :D)
Who are we? And how did we started?
Clay and I had a back and forth beginning into the maker’s movement. We started with creating stuff in our garage as most people do.
Clay began experimenting with small wood projects when we lived in Colorado and I have been drawing and painting for years.
We started looking into the upcycle and repurpose craze that has swept the nation. We would get up early on the weekends and go to yard sales and flea markets. We’d spend most of these mornings looking for a diamond in the rough in the hopes that we could flip something for a profit
We refinished a couple of chairs, dressers and several smaller items. We did manage to sell a few things, but overtime the search became more of a hassle to us. It became clear that in order to thrive in today’s market we would have to create our own style of art and décor to stand out and compete.
Clay bought a hobby store wood burner for me to practice with in the beginning of 2016. I’ve been painting and drawing for as long as I can remember, so artistic activities aren’t new to me, however I had never tried wood burning before.
I started with just burning in letters and a few freehand designs and it wasn’t long before I was completely hooked. I loved it. I love it so much more than I had ever enjoyed drawing or painting.
It was like I had found the artistic outlet I had been waiting for my entire life and part of me was sad that it took 35 years to find it.
I started burning on a daily basis and as cliché as it sounds, I knew that I had found something special.

It all started when…
A couple of months after I started burning, Clay asked me to make a plaque for a friend of his that was retiring from the Military.
He told me what he wanted on the plaque: dates, quotes, name, and an eagle.
I burned the art into the plaque and that was the beginning. Clay and I saw how it turned out and we both knew we were onto something. I soon upgraded to a professional burner brand, Colwood.
However you can also find a similar one on Amazon.
This gave me more versatility as an artist and it speed up the process with its more powerful controller.
This gave me more versatility as an artist and it speed up the process with its more powerful controller.
During the time that I was discovering pyrography, Clay was hard at work in the garage building new pieces. He made everything from coffee tables to coat racks for our house. He had started gathering pallets from anyone that was willing to give them away. He was able to pull them apart, re-plane the wood and make anything his tools would allow him to make.
By June of 2016, it was the perfect pairing. We knew together, Clay could create interesting pieces on his own and I could burn in artistic designs and portraits. We had a great idea to jump into the maker’s movement.

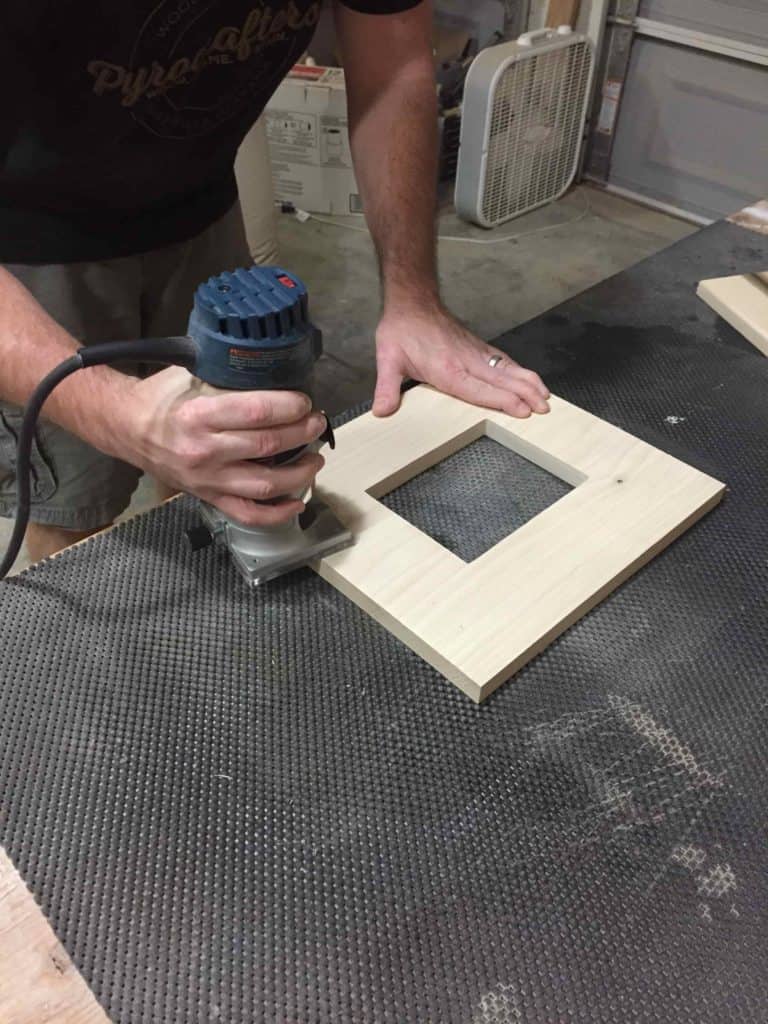
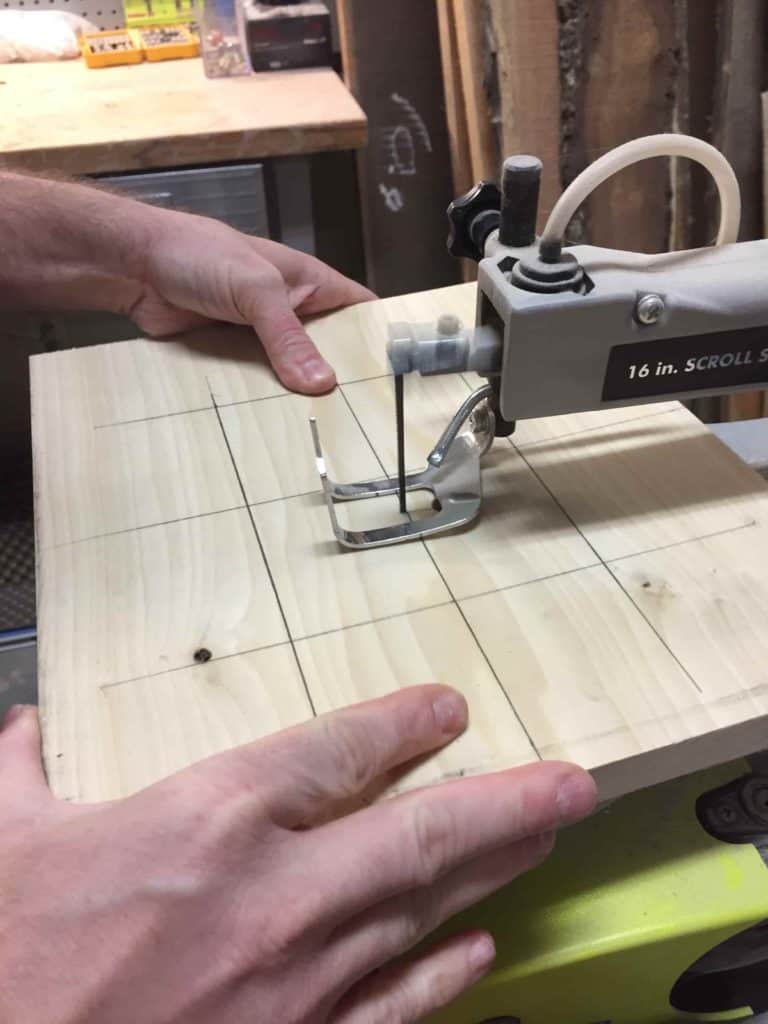
Clay’s Woodworking
Clay’s wood shop is in our garage and he builds the wood canvases while I burn. He’ll get creative with the canvases and create something that has a miter art style, patchwork or reclaimed rustic style and I’ll try to find inspiration for a burn that goes with it.
He also creates new pieces for us to experiment with from time to time. We have recently started trying to create picture frames. Clay builds wide edge frames so I can burn in a quote, a family name or an anniversary date.
Once Clay is finished building the frames, he brings them to me for burning.
Clay working on the frames
Draw guidelines using a scale to help maintain letter height and overall structure.
Add flourishes if you feel like. Don’t hesitate to draw ligatures where they fit naturally, they will help connect 2 letters and create a unique rhythm in your design.
Using the eraser certainly helps to remove unwanted strokes. You are still experimenting so feel free to add unique decorative touches to your sketch.

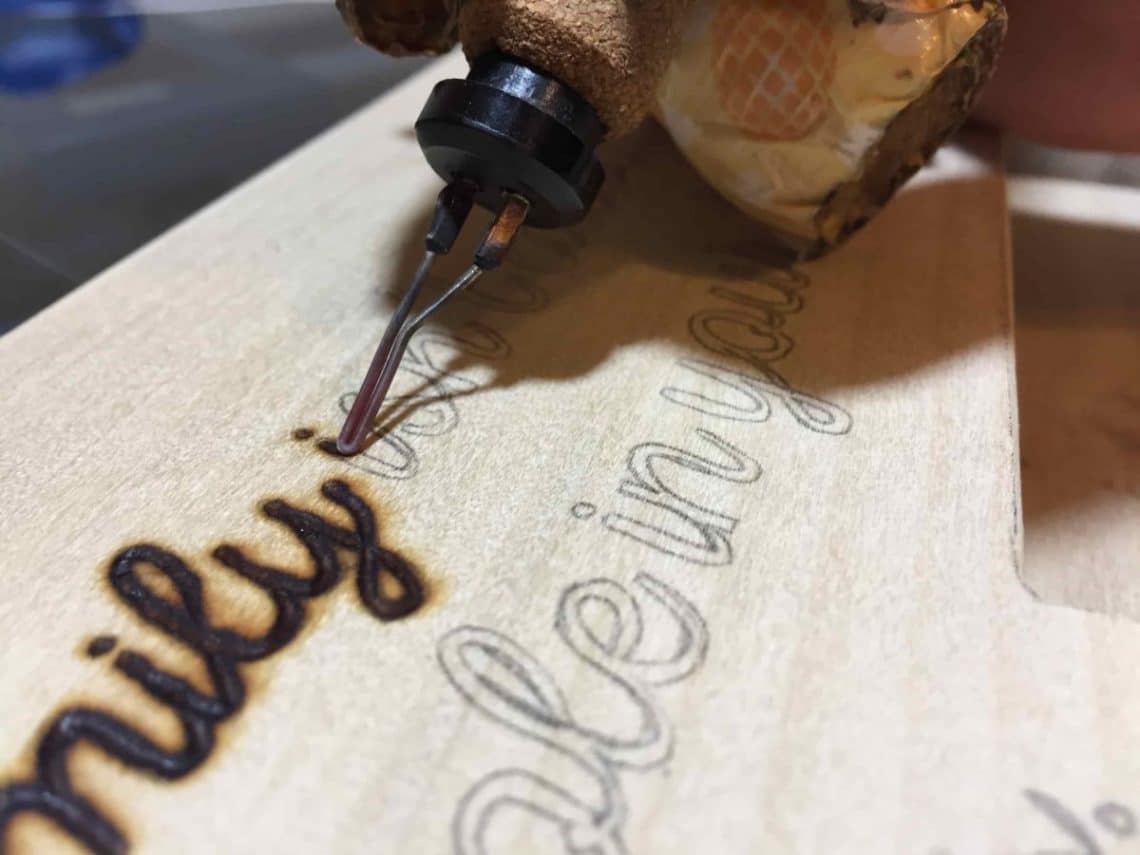
Aney’s Wood Burning Process
The first thing I do when I get a new canvas is decide what to burn in it. For these new frames, I like to choose a quote about family or something most people can relate to and would likely go with a picture.
I measure out the amount of burn space in order to create a digital file in photoshop that is the same size as the piece. I’ll open photoshop, start a new file and input my measurements. This is to make sure my lettering size is proportional to the actual frame size.

The preparation process is essential!
Now that my photoshop file is set, I’ll print out my lettering. If the size of the file is larger than an 8.5” x 11” sheet, I print out all sections of the file and tape them together to create a template.
Once my template is ready to go, I tape it to the frame and place a sheet of carbon paper underneath. I’ll spend about half an hour copying the letters onto the wood.
Copying the letters will help insure the letter sizing, spacing and accuracy. I will occasionally try to freehand letters, but for a finished professional piece I don’t chance it.
I want to make sure the finished piece is high quality and something someone would be excited to display in their home.


SAFETY IS ALWAYS FIRST
I also make sure I have on my safety gear. I wear a respirator makes, gloves and I have two fans that move the smoke. One fan is right next to my burner tip to pull the smoke and another one in the window to pull it out of the room.
The last step is finishing a piece. We may or may not add stain, it just depends on what we think it needs. These frames pieces look great with a darker stain and then we finish it with a spray Matte Polyurethane. This step will take a few days. The stain needs to dry and the several coats of poly need to dry in order to ship.

Pyrocrafters in 5 years from now?
This is a tough question. Pyrocrafters is a great passion for both Clay and I. I get to create artwork and he gets to woodwork. In a perfect world, we’d both being doing Pyrocrafters full time.
Our goal is to share this art form with others as an outlet to teach, create and tell stories. We’d love to reach out to people and connect and we are working on a few ideas that will help foster that goal.
YouTube is our next step. Instagram has been a wonderful resource for us, but we want to branch out into YouTube more so our videos can have more substance. Clay and I both work full time jobs and aren’t familiar with film/vlogging so we are working hard to figure out videography and photography. We’d love to do a documentary style web show that highlights pyrography and the process of how we work.
It’s going to take us some time to get our videos looking professional and well put together. It’s a big learning process for us.
In the meantime, we are going to keep working on projects that are important to us and creating custom work for people who enjoy what we do. You have no idea how appreciative we are that people enjoy watching us work and want to connect with us. It’s very fulfilling and we are excited about the future.

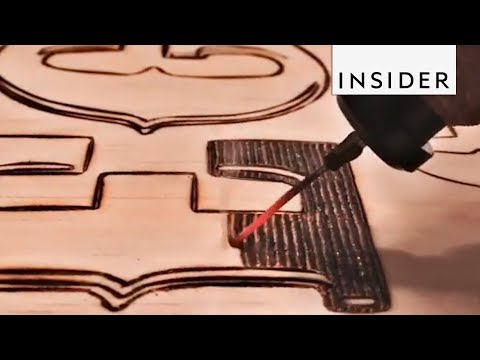
We also created a video showing the whole process so be sure to check it out below 😀


Stay updated with my tutorials and get instant access to the Lettering Crate –
A growing library of free lettering & calligraphy resources that includes –
Pin me!
About the author
Pyrocrafters are professionals in the art of pyrography or wood burned art!
Clay and I, Aney, are a husband wife duo that build wood pieces and create wood burned artwork. We are providing unique and exquisite pieces that are custom and handmade. We specialize in portraits, military plaques, animal portraits, and other pyrography pieces based in Prattville, AL.

Really helpful! Question- I’m trying my first project and the wood is sanded. But underneath the grain keeps causing small circles as I burn across the grain. How do I stop this??? I was able to get a professional burner, but it is still happening. Aagh! Thanks!
My best recommendation is to reach out to the Pyrocrafters and ask them directly.
The reason you get the black circles is because of the wood or because of the pressure you are putting on the burner itself. A lot of times you can even out the lines by burning in between the black circles or use an exacto knife, don’t use the tip use the flat of the blade, and scrape away some of it, be careful not to dig into the wood. But if you let up on the pressure some it will help with the black circles and lower the temp. It also could be the speed at which your making the line if your going too fast it’ll skip over the wood. Sorry this is all over I think of things as I’m typing! I hope this helps!
The black circles can be from numerous things. It can be from the temperature being too high, it can also be from the grain in the wood or possibly sap, it can also be from putting too much pressure on the burner, or burning too quickly and the tip slipping over the wood. One other thing it could be is the tip, you could need one that’s a little rounder to go smoothly over the wood.
A couple of things you can do to fix this. You can slow down, change the tip, burn in between the circles a little thicker to make the line smooth. Or you can use an exacto knife, I don’t know if this will help, but you take the edge, not the tip, and scrape the extra burn off. Sometimes it works sometimes it doesn’t depending on how dark and deep the burn is. Don’t use the tip of the exacto knife because it’ll cause you to dig the wood. So you use the edge and gently scrape, don’t do too much because it’ll put a dip in the wood, so just gently it might not take it off but it might make the burn less noticable. That would be my last resort! Hope this helps!
These are beautiful projects!
I received a burner as a gift. (Think the $22 Amazon type). What tip do you suggest? Also what type of gloves do you wear?
Thanks!
There are several different tips you can use for lettering with a solid tip burner. I’ve used a Walnut Hollow Versatool for the last 15 years and love it! Any of the pointy tips would be good for lettering. Which one you use depends on the type of wood and the grain. You don’t want to use the super pointy tip with a bumpy grain. I use a “finger nail” test. I know not very technical! I run my finger nail over the grain if my nail bumps over it I know to use a rounder tip not the super pointy one. Test out your different tips, play with them and you’ll learn which ones work best. Since this comment is 7 months old and hasn’t been answered I’m guessing you probably have figured that out. But I hope this helps you out in some way. Happy burning!
Wow! Thank you so much for the thorough comment Cathy! 🙂
Hello. Thank you for your good content. I’m a carpenter and I wrote an article about the best wood for wood burning art. I’m glad to know your opinion about that. thanks
https://wooddad.com/best-woods-for-wood-burning-art/
Thank u so much for sharing .
I live in South Africa so we dont get so many people like yourself willing to share as u have done.
I have started but very green at this.
My husband out of work so we need to make a living we do other things but we are so interested in the above.
Thanks again and well done u guys rock.
Erika and Les Engelbrecht
Hey there, thanks for the comment.
It’s great to hear that you just started and that you found this article helpful.
Be sure to share some of your work on the website forum 🙂 looking forward to see it!