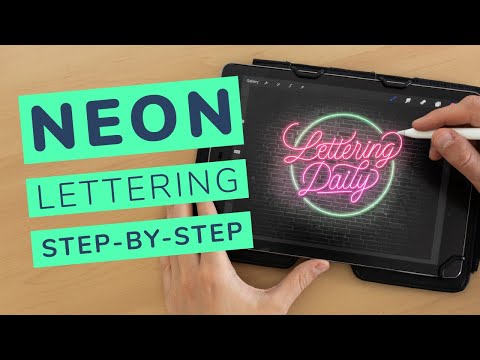
Do you want to learn how to create a neon lettering effect in Procreate?
You’ve come to the right place!
In this tutorial, I will guide you through the whole process, step-by-step.
Creating the neon effect is easy, and this tutorial is also suited for beginners.
Here is a quick overview of the things we’ll be going through –
- What you will need for this tutorial
- Step-by-step process
- A few extra tips
Without any further delays, let’s dive right in!
If you prefer watching over reading, I’ve also made a YouTube video you can check out instead –
What will you need for this tutorial?
We just need a couple of things.
First and foremost, you’ll need an iPad Pro, an Apple Pen, and of course, the Procreate app.
")
Aside from that, you’ll need a brick wall photo.
The one I am using is from Unsplash.com.
")
Feel free to use any other background.
I just feel it’s a good fit for the neon sign.
You can use any colors you want (as long as they are bright and saturated).
I found this super cool website with a ton of neon color palettes. You can check it out here.
")
Finally, I’ll use specific brushes, but I’ll mention those in the step-by-step instructions.
Let’s get started with our neon lettering sign!
How to create a neon lettering sign in Procreate – step by step
Step 1 – Setting up your canvas
You can select screen size or any other size you prefer.
However, if you plan to share it on Instagram, I highly recommend choosing a 4:5 ratio (1080×1350).

Step 2 – Import the brick wall.
Download the brick wall image and open it in Procreate.
You can also copy it directly from Unsplash and paste it into Procreate.

Step 3 – Create the vignette.
Once you have your brick wall image imported, open up the hue, saturation, brightness panel under the adjustment (top left corner).
Reduce the saturation to zero, so you have a black & white brick wall like this –

Open up a new layer, fill it with black color (by dragging the black onto the screen).
Select the eraser tool, pick the soft brush (under airbrushes) and gently start deleting the black color in circular motions.
You should be having an image like this –

This will create a vignette effect.
The vignette creates a more dramatic look, keeping our subject in focus while the background is darker.
Step 4 – Create your lettering.
If you look at neon signs (at least the old school tube version), they are all created in the same width (monoline).
To keep things simple, that’s how we’ll do it as well.
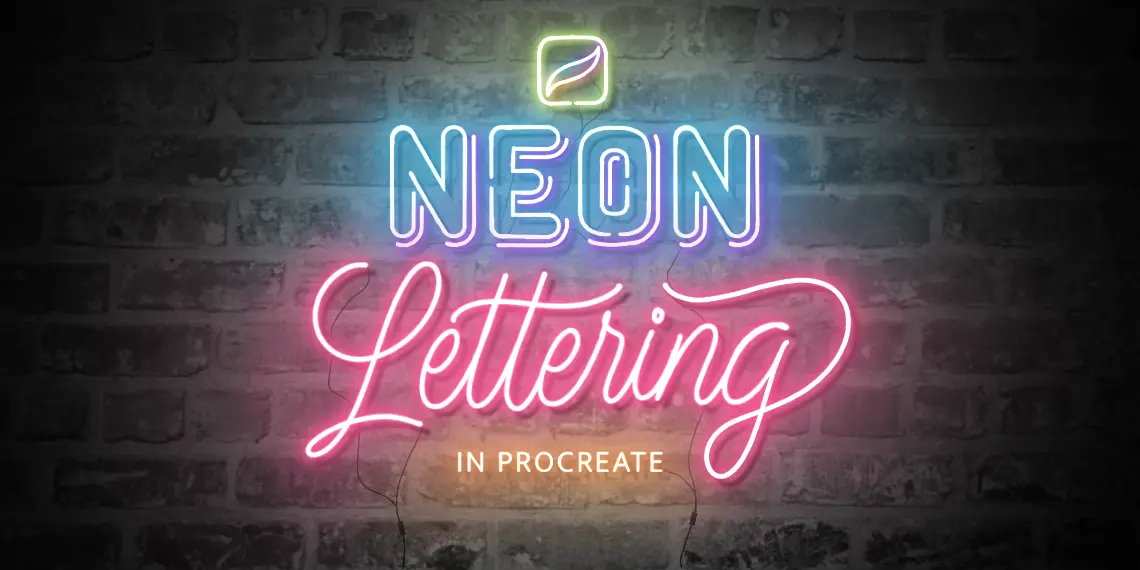
For my example, I’ll do a “Lettering Daily” neon sign. Feel free to pick your word/s.
To keep our letters beautiful and consistent, we need some guidelines!
For that, I’ll use The Grid Builder brush pack, which is specifically created to help you with your lettering layouts and compositions.

It’s easy to use, super helpful, and I use it regularly.
I wrote a review/tutorial on the Grid builder, which you can check out here.
To write my letters, I’ll use the monoline brush from DK’s brush pack.

However, you can use any monoline brush you have at hand.
Make sure your letters are white.
Once you’ve created your lettering, you can remove the layer with the guidelines.

Step 5 – Duplicate your layers.
I am going to duplicate the lettering layer four times.

Here is why –
- Layer 1 – is for the shadows
- Layer 2 – is the first shade of the color glow (less bright)
- Layer 3 – is the second shade of the color glow (more bright)
- Layer 4 – Is the white lettering we did in the previous step
Step 6 – Add the colors.
Select your neon color.
I’ve picked mine from the website I mentioned earlier.
I just found the palette I like the most, took a screenshot, and imported it directly into Procreate.

In Procreate, you can then use the eyedropper tool to select the specific colors.
You can then save your colors as a new color palette and simply remove the image.

You can also pick whichever color you want.
Just make sure it’s well saturated!
To quickly color these layers, turn them into alpha lock.
You can do that by swiping the layer on the right with two fingers.
You can also just click on the thumbnail image and select alpha lock.
Once they are in alpha lock, just select the color, click on the layer thumbnail, and select fill layer.
My first shadow layer will be black.

The second layer will be the main neon color we selected
For the third layer, just add a bit of brightness since the light is brighter when it’s closer.

Next, turn off the alpha lock feature (this is crucial. Otherwise, the next step won’t work!)
Step 7 – Add that glow!
It’s time to create the actual neon effect and make our letters glow.
Select the second layer and go on the adjustment panel and select the gaussian blur.

In my case, I’ll slide it at around 10% – for you; it might be a bit more or less.

What matters is that we get that solid initial glow.
Now select the third layer (with the brighter color), and choose Gaussian blur again.
This time slide it a bit less to about 7-8%

Perfect!
Now merge these two layers and duplicate them twice to make that glow really pop!


Finally, select the main lettering layer (the one in the white color), and under blend, modes choose to add.

This will make the white glow even more.
As you can see, this already looks like a pretty decent neon effect, but we miss just a few more details.

Step 8 – the secret is in the details!
Remember the bottom layer that we colored in black?
It’s time to put him in the game!
Select it, slide it slightly down and on the right, like so –

Head over the adjustment panel, select Gaussian blur and let’s soften up that harsh shadow.
I would say about 3-4% is good.

Next up is the light cast by the neon sign.
Open up a new layer right above the shadow layer.

Grab the soft airbrush, select the main (darker) color, and go roughly around the whole piece.
Then open up the opacity and drop it down to around 20%.
Here is how it should look like –

Lastly, we need to add some cables.
Otherwise, how can the sign even glow??
What’s important here is that you draw a “cable” from each individual part.
So if there are five letters connected, that’s one single piece and needs only one ”cable” connection.

And congrats!
You’ve successfully created your neon sign!
A few extra tips to make your neon sign stand out
I just wanted to share a couple of tips and ideas that you can implement in your future projects.
You don’t have to do any of these, we’ve covered the main part above.
My first tip is –
Add a geometrical shape in the background.
It can be a –
- square
- circle
- triangle
- diamond
All of these can nicely complement the composition of your piece.
Illuminating these shapes follow the same process as for the lettering part.
Open up a new layer underneath the neon lettering.

I suggest to make these shapes thinner than the neon lettering.
The contrast between the two parts will help the neon lettering stand out even more.
To get clean and precise shapes, draw the lines, hold them, and Procreate will make them super straight—the same works for a circle.
If you then put your finger on the screen, Procreate will lock the angle on 15 degrees increments.
As for the circle, it will make it perfectly round.
For my example, I’ll use a circle shape.

Once you have your shape in the back, delete the parts where it overlaps with the neon lettering, like this –
Make sure to round off the endings.

Add a complimentary color!
You can pick a ton of sweet-looking neon color palettes from the website I initially linked.
You can also create your color combos.
If you are not sure how to pick the right colors, you can check out this article, where I teach you how to do it.
You can add the complementary color to the background shape we just added.

You can also add a cool gradient effect.
Merge the layer that makes the letters shine with the layer that casts the light on the wall.
Pick your complementary color along with the soft airbrush, and gently start applying the second shade.
Here is how it looks with a subtle gradient.

Combine different lettering styles.
Lastly, I want to suggest combining different lettering styles in one piece.
Combining script and sans serif can create some awesome-looking designs.
Kinda like I did for the cover image –

The process is absolutely the same as we already did.
You can top that off with the other tips I shared.
Adding a second or even a third color.
Perhaps an illustration in the background, or even some neon shading on your letters (again like I did with the cover image).
The possibilities are endless.
I highly recommend you head over to Pinterest and search for “neon signs” or “neon lettering.”
There is a ton of inspiration you can find and use for your future projects.
")
Final words
There you have it, friends!
This is how you can create a neon lettering effect in Procreate.
The first time you do it, it may seem complicated, but once you get the hang of the process, you can do it quickly.
If you have any questions, feel free to drop a comment or send me an email.
If you have some wishes and suggestions for future tutorials, feel free to let me know!
Until the next time,
Stay AWESOME!
Pin me!


Stay updated with my tutorials and get instant access to the Lettering Crate –
A growing library of free lettering & calligraphy resources that includes –
About the author

Hey, I’m Max. I’ve been drawing and messing around with letters since 2011. I don’t have a formal art degree—my background is actually in the kitchen as a former chef and on the streets painting graffiti with my friends. Over the last decade, through a ton of trial and error, I somehow turned that obsession into a full-time gig. These days, I design custom logotypes for global brands and paint large-scale murals. I started Lettering Daily just to create the kind of honest, no-BS tutorials I wish I’d had when I was starting out. Stick around, and let’s draw some letters.

Thanks for this awesome tutorial!!! Well written and easy to understand. My piece looks amazing!
Thank you, Tia! 🙂
Thank you so much for this tutorial. Your method of explanation is very well. This is very helpful for me. Design your neon sign is not an easy option for everyone and not everyone does that. Also, I want to share if someone wants to make your custom neon signs in then they contact us. PH 908-486-7000
Thank you, Tony!
Thank you for this super clear and easy to follow tutorial on how to create neon words in procreate. I just used this technique to create a logo for a fake business for a group assignment and it turned out exactly as I imagined. The step-by-step images were really useful. Thanks again!
Hey Zoe! Thank you so much for the kind words 🙂 I am super happy to hear that you found this tutorial to be helpful. Would love to see the logo you created! Feel free to shoot me an email or even an Instagram DM.
Thank you so much for this! Will definitely share once I finish. May I ask how to add the complimentary color for the circle? Am I repeating certain steps?
You are super welcome Serina! 🙂 I am really glad you liked it and I look forward to seeing your creation. As for your questions, you add to complimentary color to your geometrical shape (or any other shape for that matter) by repeating the exact same process as for the letters. Hope this helps! If you have any other question, please feel free to let me know 🙂