Creating your own font may see as an advanced procedure that requires a lot of time and effort.
Lucky for you we are here to make your life easier and we will help you from start to finish with the creation of your own unique hand written font!
Today’s article is all about custom font creation with a software called FontSelf!
Note: In order for you to start creating fonts with Fontself, you need to have either Adobe Illustrator or Adobe Photoshop installed on your computer/laptop.
In this article you will learn:
- What is fontself?
- How to set it up?
- What are the steps for creating your own font?
- How to finalize it?
- What can you do with it
SO WHAT IS FONTSELF?
Fontself is independent software start up (fairly new, 2015) created by 3 guys, Pierre Terrier, Marc Escher and Franz Hoffman.
Summarizing their history (available here) they have successfully crowdfunded their idea back in 2015 and it didn’t took much to take over as one of the leading font creation software on the market!
From a personal perspective what makes this software so good is user friendliness. It could be used both on Adobe Photoshop and Adobe Illustrator (the focus of the article will be the creation of your font with Adobe Illustrator).
Fontself is extremely easy to use and even very beginners could handle a standard font creation process.
With plenty of tutorials and guides on how to create your own font, the easy to use drag and drop interface really creates a pleasurable experience.

Before we roll up our sleeves and start breaking down the process behind the creation, you should know that you are your only limit in the process.
The use of the software within Illustrator allows you to manipulate every single aspect of your font, but we will talk about that later on.

A beautiful handwritten font made by Sam Parrett!
HOW TO SET UP FONTSELF AND START CREATING YOUR HANDWRITING FONTS!?
The guys at Fontself really understand the concept of user friendliness and therefore they made this step very easy to follow!
A great aspect from Fontself is the one-time purchase instead of a monthly subscription.
Best of all is that if you purchase the software through this link you will get a 10% discount of the retail price (49 U.S Dollars) both for Illustrator and Photoshop.
You should consider this as some sort of investment because once you create your own font, you will have the possibility to monetize it!
We will talk about that later on it the article.

So once you have purchased the software you will receive a download link in your email, along with a activation code which will enable your license and allow you to start work with the program.
*Please keep in mind that you need to be updated to the latest versions of Illustrator/photoshop in order for the software to work.
Well, once you have downloaded, installed and activated Fontself that is pretty much it! From here the fun can finally begin 😀

Probably this should go without saying, but in our opinion it is good to mention it: the outcome of your work will depend on the effort you invest (I know I sound like a grandpa!)
But this is completely true, don’t just rush in and try to create something in 15 minutes and expect the program to do the work instead of you!
It will take you some time firstly to get to know the program but we promise you that after the 2nd or the 3rd font that you create, you will already be much faster compared to your first time.
1. START DRAWING YOUR CHARACTERS
Ok so in this step you determine your style. You can use any tool that you like, brush pens, pencils, markers, etc.
You can either create a basic font or advanced one and the difference between them is the number of characters that are included, which means that the advanced ones simply supports multiple languages.
However if you are just starting out, we would definitely recommend you to stick to the basics.
Fontself includes a template which comprehensively explains which characters you need to include.
So the important thing is that divide the font in different groups as following:
- Uppercase letters
- Lower case letters
- Numbers
- Symbols
Each of these groups should be created in a single line as you can see in the picture below.
This will allow you to simply drag and drop your characters in to the software, but before that there are just a few more steps.

2. IMPORTING YOUR CHARACTERS INTO ADOBE ILLUSTRATOR
There are a few different ways you can import your characters in to Illustrator.
You can either take a picture of the letters you have created on the paper but we highly recommend that you scan them.
If you don’t have a scanner fear not!
We live in an awesome era where technology is very developed and you can simply download a scanning app on your smartphone 🙂
Now that you have successfully scanned your font, simply import/open them in illustrator.

3. VECTORIZE IT!
We are almost there!
At this point you have 2 different options.
- Automatically vectorize the letters (a.k.a. image trace)
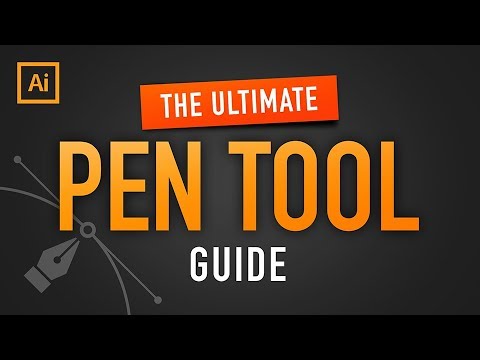
- Manually vectorize the letters (with the pen tool)
You may wonder what is the difference?
Both time and precision!
Perhaps you remember that we mentioned earlier that you can manipulate every single aspect of your creation, and that’s where the manual vectorizing process comes in! (the pen tool)
Keep in mind that manual vectorizing is more complex and it requires a bit of practice before you start to create with it. If you would like to learn how to use the pen tool in Illustrator, we highly recommend watching this tutorial created by Made by Mighty.
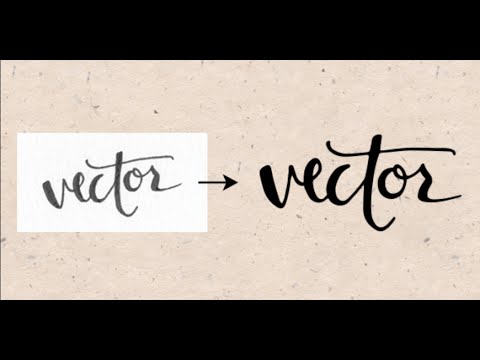
However if you don’t really feel like spending hours on creating the font you can automatically vectorize your letters by using the image trace feature.
Teela Cunningham has a great video tutorial that explains the best way on how to adjust the settings for the image trace feature.
4. DRAG AND DROP
This is the easiest step of the process and one of the main reasons we love Fontself!
Once your letters are divided in groups and vectorized, you simply select them all, and literally drag and drop in the Fontself software.
Poof! Congrats! You have officially created your own hand written font!

5. YOUR HANDWRITING FONT IS ALMOST READY, LET’S FINALIZE IT!
Ok, so this step requires a bit of patience.
But don’t worry! It is not complicated at all.
You will want to run several tests in order to ensure that your ligatures are in order as well as the spacing, the heights etc.
Lucky for you, Fontself made this extremely easy, but you will want to spend some time writing random words and sentences to see everything is in the right order.
Keep in mind that this is a handwritten font, so imperfections are not something you should worry to much about.
Once you feel that all the letters are interacting good with each other, you simply export the font and Fontself will create an OTF file which then you can install on your computer.
In case you wish to have also the TTF version of your font just follow this quick guide by the guys from Fontself!

WHAT CAN I DO WITH MY HANDWRITING FONT?
Good question!
Well to be honest you can do whatever you like with it!
Usually a font is created for either private or business purposes.
There are many website where you can register in order to sell your fonts.
We highly suggest you to start doing so on the
A very user friendly website with excellent customer support will get your online store up and running in no time!
Be sure that if you stick to it, font creation could be a very lucrative way of monetizing your artwork. Be sure to check out this video (on the right) to better understand what do we mean by that 😀
CONCLUSION
Simply said, creating your own font at first could seem as something overly complicated that requires way too much time and effort.
But it’s not!
As mentioned earlier, you will struggle a bit at the beginning with the first few fonts that you create but the more you do it the better you will become and very soon your imagination will be the only thing which will define your limits!
Remember to get the Fontself software through this link in order to get your 10% discount!
Are you a student or a teacher? Well the guys at Fontself are so awesome that they have decided to give a 50% discount for it!!
If there is something you may not understand, or you simply have a question you can either check the FAQ section from Fontself here or you can reach out to us!
Until the next time,
Stay AWESOME! 🙂

Stay updated with my tutorials and get instant access to the Lettering Crate –
A growing library of free lettering & calligraphy resources that includes –
Pin me!
About the author

Hey, I’m Max. I’ve been drawing and messing around with letters since 2011. I don’t have a formal art degree—my background is actually in the kitchen as a former chef and on the streets painting graffiti with my friends. Over the last decade, through a ton of trial and error, I somehow turned that obsession into a full-time gig. These days, I design custom logotypes for global brands and paint large-scale murals. I started Lettering Daily just to create the kind of honest, no-BS tutorials I wish I’d had when I was starting out. Stick around, and let’s draw some letters.

How you managed to take this informative article and turn it into an interesting piece of writing is simply amazing to me. After reading this article i get to know more about calligraphy
Thank you, John! This is an old post, but I will update it soon with much better info.
Wow Amazing, Your every step about MAKE AWESOME CALLIGRAPHY FONTS is clear and accurate. I really appreciate you keep it up and give more information. Thank you so much.
Thank you so much! 🙂