This post and the photos within it may contain affiliate links. If you purchase something through the link, I may receive a commission at no extra charge to you.
In this article we are going to talk about some useful lettering/calligraphy tools that can help you to further improve your artwork.
In some of our previous articles we already talked about the essential tools that you need in order to get started, however, in this article we are reviewing a different type of lettering/calligraphy tools.
Before we jump right into it, here is a quick sum up of the things we are going to talk about –
- Why do i need these tools?
- A list of 10 helpful lettering/calligraphy tools
- A few honorable mentions
- Final words
Without any further ado, let’s get started!
Why do i need these tools?
First, if you’re new to calligraphy, I highly recommend checking out the article on the essential calligraphy tools.
In this list we want to show you a different selection of tools that might not be so popular – especially among beginners.
The more you practice the more you will start to expand your skills and knowledge.
With time you will slowly start to push the boundaries of your creative comfort zone and start trying new tools and techniques.
If you ever plan to start monetizing your artwork (and potentially make a living out of it), you will eventually have to invest in better equipment and tools, as that will have a direct impact in your workflow.
In case you are just starting out then perhaps these two articles below are more suitable for you – depending on if you are more interested in lettering or calligraphy.
Let’s get started with our list of helpful lettering/calligraphy tools!
1. The light tablet

This tool is extremely helpful especially for those who are keen to refine their work to the smallest details.
The light tablet is basically a very thin plastic surface with LED lights underneath.
You simply place your artwork on top of it, you flip the switch and you say – ‘’let there be light!’’ (this last part is optional)
The high illuminated surface allows you to spot every single detail of your artwork, and thus giving you the opportunity to further improve it.
However, the light tablet has another great purpose for total lettering beginners (aside from having a clear view of your work).

Let me explain –
In our ultimate hand lettering guide we talk about some fundamental elements about lettering, such as the importance of balance, consistency etc.
As a total beginner it’s quite difficult to be aware of all of these things, and it’s something that naturally develops with time and lots of practice.
A great way to improve is by tracing artwork from more experienced lettering artists.
Now hold on, I’m not saying that you should just copy work from other artists!
What I’m trying to say is that by tracing, you have a chance to experience and observe directly the different shapes, letterforms, spacing, angles etc.
By doing that you are able to train your eye and implement these observations in your own creations.
Of course, you shouldn’t be just endlessly trace other people’s work (otherwise you won’t learn anything), you should also practice your own letters and develop your own style – it’s all about balance!

So how do you do this?
Find some artwork that you really like – We always recommend Pinterest or Instagram when you are searching for inspiration.
Print it, put it on the light tablet, add a new sheet of paper over it, and VOILA!
Note – This is just for training purposes, we are strongly against copying other people’s work and posting it online as your own, without giving any credits – logically, you wouldn’t really enjoy if someone took your ideas and presented them as their own, that’s mega lame!
2. Tracing paper

Much like with the light tablet, tracing paper is excellent for both tracing and refining your work.
However, tracing paper has another great use when it comes to transferring your work to premium paper that you don’t want to mess up with those excessive pencil marks – especially if you work on multiple words and intricate lettering compositions.
Not so long ago, we were lucky enough to host our dear friend Chandan (a.k.a @see_mahimkar) who is an extremely talented and experienced lettering artist.
In this amazing step-by-step tutorial, Chandan reveals a very interesting method involving our beloved tracing paper, and i HIGHLY recommend you check it out!
3. Tombow Mono Zero eraser
Picture this scenario – you are working on awesome lettering piece, you are in a good mood, the sun is shining, the birds are singing etc.
You unfortunately make the wrong move and you leave a nasty line right in the middle of your piece :O
You grab your standard eraser, you start to fixing up the mess just to realize that you’ve now deleted half of your piece!! – not good…
Well my friends, say no more to those crappy moments!
The Tombow Mono Eraser was created exactly in order to avoid these kind of frustrating moments.
This awesome tool has a small eraser tip that will help you fix even the smallest details without screwing up half of your work.

4. The kneaded eraser
Another great alternative to the conventional eraser is the kneaded eraser, and here is why –
The traditional eraser has several negative aspects to it, it has a limited life span, it leaves eraser particles every time you use it, and it can leave smudges on your paper if the tip is not white (requires cleaning)
The kneaded eraser is the total opposite!

It’s self healing, you can rip it apart and then mold it back together.
It will never leave any particles or pieces after you erase it and it will also never leave any smudges.
The only downside of the kneaded eraser is that it’s not the best performer when it comes to hard and dark pencil lines.
Nonetheless, with both lettering and calligraphy, the pencil is mostly used for light sketching and light guidelines that the kneaded eraser can easily erase.

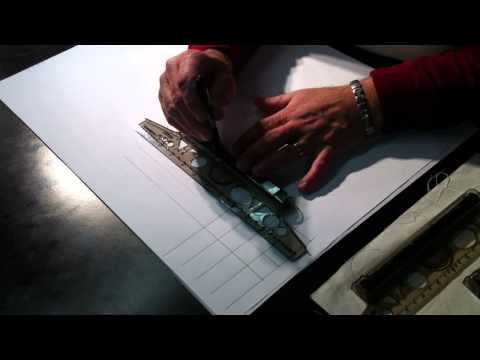
5. The rolling ruler
If you have been reading our content in the past then you probably know that we mention this tool quite often.
The rolling ruler is probably one of my personal favorites on this list!
What makes this ruler so awesome is how quick and simple it is to use it.
The rolling ruler is basically a ruler with a wheel on the backside that allows him to roll easily across the surface – hence the name.
One of the most common beginners mistakes is not using guidelines.
It’s understandable why so many people skip this step – you are still learning the basic strokes, how to sit, how to hold the pen, thick and thin transitions etc.

Nonetheless, i can’t stress enough how important guidelines are for both hand lettering and calligraphy.
Let me give you a bit of perspective on why this step is so important.
When you write or draw letters, your mind is thinking about several things like –
- how much pressure to add,
- when to lift the pen,
- how long should the line be
- How fast should i go with my strokes
- Are all of the letters in the same height and angle
The list goes on and on…
Basically, the more thing you have to think about, the harder it gets for the mind to stay focused.
So wouldn’t it be nice if we could reduce the list that we just mentioned?
You see, when we have our guidelines in place our mind doesn’t need to worry anymore about the angles and heights of the letters – because now we just need to follow these lines.
Simple as that!
With the help of the rolling ruler you will be able to draw straight parallel lines with your eyes closed!
(however, for best results keep them open)
Check out this awesome video that shows you the capabilities of the rolling ruler!
6. The Composition Ruler
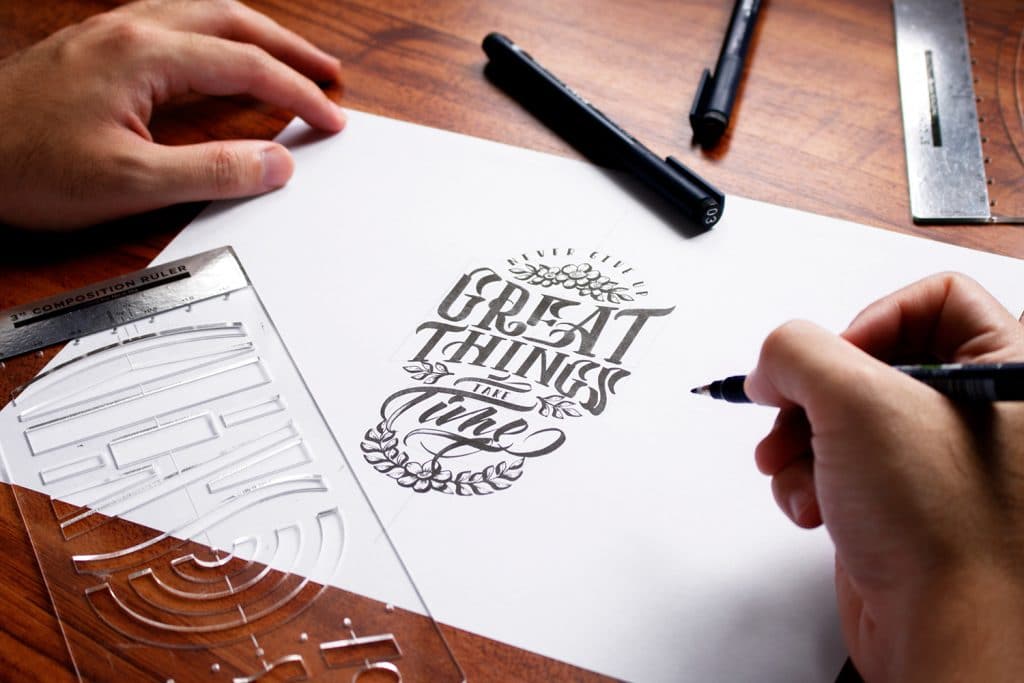
It’s no surprise that lettering composition and well thought layouts are no easy task – especially for beginners.
This exact issue inspired the creation of the Composition Ruler!
The Composition Ruler is a tool created by Nico Ng – and it’s sole purpose is to help you create beautiful, well crafted layouts without going crazy.
If lettering layouts and compositions are something that you would like to learn or improve, then i highly suggest you checking out this article.
7. Microphone stand
You might be thinking – lol, what? but bare with me…
When it comes to building an online audience there are several actionable steps that you can start taking right away.
However, the most important part is obviously, sharing your artwork.
Different artists like to focus more on photos while others prefer videos (we recommend a mixture of both), and whatever type of media you prefer, you still need to put effort into the way you present your artwork.
An important element of the presentation is the placement of your camera (whether it’s a smartphone or a DSLR), and the microphone stand is an awesome and cheap alternative!
The microphone stand is very versatile and allows you to place your camera in different angles without any headaches.
Check out this video below that shows you all you need to know about it –
The whole set up will cost you less than 30$ and here is what you will need –
- Amazon’s basic microphone stand
- 5/8″-27 Female to 1/4″-20 Camera Adapter
- Universal Mount Adapter (if you plan to use your smartphone)
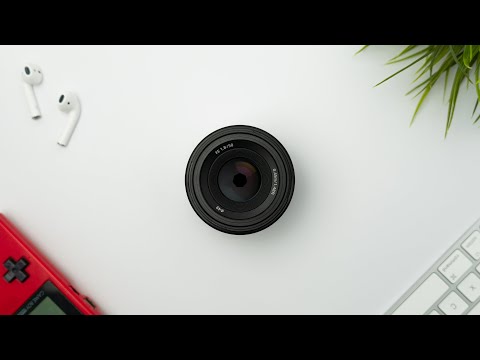
8. The video light
One of the most important factors for good photography and videos is good lighting!
Now, daylight is by far the best source of light, however some people might not have access to it.
Perhaps you live in a country where it’s raining quite often and there is not much sunlight.
Maybe your work desk doesn’t have a window next to it, or you simply don’t want to be limited and constantly have to adjust to daylight.
Whatever might be the issue, there is an awesome tool that can help you overcome this problem.
The video light!

A small, portable yet very strong video light is a great investment for those seeking to step up their presentation.
Here is the one that i use, and it definitely helped taking better and clearer pictures – whether it’s for taking photos/videos for tutorials or for some personal projects.
9. Scanner
A scanner is a very helpful tool when it comes to working with digital software such as Photoshop or Illustrator.
You could just take a clean photo (with good lighting) of your artwork and then transfer it to your computer, however, it won’t yield as good as a result if you were to use a good quality scanner.
If you are or plan to work with digital lettering on projects such as –
- Photo overlays
- Additional editing to your lettering
- Vectorization
- Creating handwritten fonts
- etc.
Then a scanner is definitely a good investment.
The important question is –
Which one to get exactly?
Well, we are looking for something with a good balance between the quality and price.
After doing some research, the Epson Perfect V39 seems to be the leading model in that category – scanning at a maximum of 4800 DPI resolution.

10. Art supplies storage box
Ok so you probably heard that famous theory about how messy people tend to be more creative?
Well, although there might be some truth in that claim you definitely want to avoid having a messy desk and instead keep your art supplies organized.
If you are just starting out with lettering/calligraphy you are probably going to have only a few pens and maybe one or two notebooks that you use for practicing.
Believe me, it won’t take long for you to start to experiment with new supplies and different writing tools – soon enough your toolbox will start to expand.
Once that happens you want to find an effective way of keeping your work space in order, and you can either improvise with what you have in your home, or you can simply invest into a storage box.
Talking from experience, having an organized environment will positively manifest in your workflow and generally the way you do things.
This one seems to offer a good amount of storage room for a very decent price.

A few honorable mentions
We covered 10 helpful lettering/calligraphy tools but before we end this post, here are a few honorable mentions –
1. Gouache – a type of paint that is usually consisted of a natural pigment, water and a binding substance (such as gum arabic)
The really cool thing about gouache is the different type of application.
It comes in a thicker form (like a paste) that can be diluted with water to a consistency that you prefer.
You can paint full lettering pieces with it and it’s also great as an (cheaper) alternative to calligraphy ink.
It will require some trial and error before you get the best liquidity depending on the nib that you use – basically, if it’s too liquid you add more gouache while if it’s too thick you just add more water to it.
2. Eye dropper – a very cheap yet very useful tool if you like to play around with ink.
It is especially helpful if you want to refill you old brush pens and markers.
Did you know that you can refill your old markers and brush pens?

3. Flat brushes – if you are fond of calligraphy styles (scripts) that are performed with a flat nib, such as – Blackletter, Italics, Roman capitals etc.
Then working with flat brushes is definitely something you should try!
In combination with the previously mentioned gouache or watercolors, you can achieve some really interesting textures + they are really cheap!
Final words
As mentioned in the beginning, all of these tools that we talked about are not something that you need in order to get started or just practice on a daily basis.
As time passes you will learn and try new things, skills, techniques etc.
You will become more curious and willing to explore different corners of this beautiful art form.
When that moment comes you can use this list as a point of reference.
What about you?
Do you have a tool that you found useful and that you think it could be helpful for others?
Feel free to share it with us, and we can always update and increase this list!
We also want to invite you to join our official Facebook group which is a place for lettering & calligraphy artists to share their artwork, ask questions, network with others and much more.
We also provide constructive feedback to your work, with custom tips and resources in order to help you elevate your lettering & calligraphy skills to the next level.
Thanks for stopping by and until the next time,
Stay AWESOME!

Stay updated with my tutorials and get instant access to the Lettering Crate –
A growing library of free lettering & calligraphy resources that includes –
Pin me!
About the author

Meet Max Juric, a dedicated calligraphy and hand lettering artist with over a decade of experience. His artistic journey is deeply rooted in a passion for lettering and a commitment to continuous growth. Max’s extensive experience spans several years as a full-time lettering artist, collaborating with clients from around the globe. Over the past five years, Max has actively shared his expertise, reaching more than 100,000 individuals monthly through a rich array of educational resources. These resources include tutorials, interviews, articles, and podcasts. Max’s practical experience, combined with his unwavering dedication to his craft, sets him apart in the realm of hand lettering and calligraphy. With an educational platform offering over 100 long-form resources, Max aims to guide artists and enthusiasts in enhancing their hand lettering and calligraphy skills. Welcome to Lettering Daily, where artistic expression and learning beautifully intersect.
I am 67 years old and new to calligraphy. I am always learning what to do and what not to do. Loved this piece. Thanks
Thank you, Rosemary! I really appreciate it 🙂