This post and the photos within it may contain affiliate links. If you purchase something through the link, I may receive a commission at no extra charge to you.
In this tutorial, you will be learning the fundamentals of the Copperplate script from an insanely talented calligrapher and a truly hard-working and dedicated artist.
Tri Le (a.k.a @tri.shiba) is an exceptional artist that excels on so many different levels, and it’s a real honor to have him sharing some of his knowledge and experience.
Big thanks to Tri Le for taking the time out of his busy schedule and for contributing to our growing community.
Let’s have a quick overview of what you will be learning in this article/tutorial –
- Tools and materials needed
- Preparations – how to hold your pen & how to sit
- Sizing and angles of the Copperplate script
- Writing rules and basic strokes
- FREE downloadable practice sheets
- A few extra tips + additional resources
- Final words
Quick note – Of course, it’s impossible to fit everything about the Copperplate script in a single article, so keep in mind that this is just a beginners guide covering the very basics.
Tools and materials needed
Before we jump right into the writing part, let’s have a quick overview of the tools that we need in order to practice the Copperplate script.
- The pen holder
- Nibs
- Ink
- And paper.
In traditional Calligraphy, the fundamental and specialized tools are –
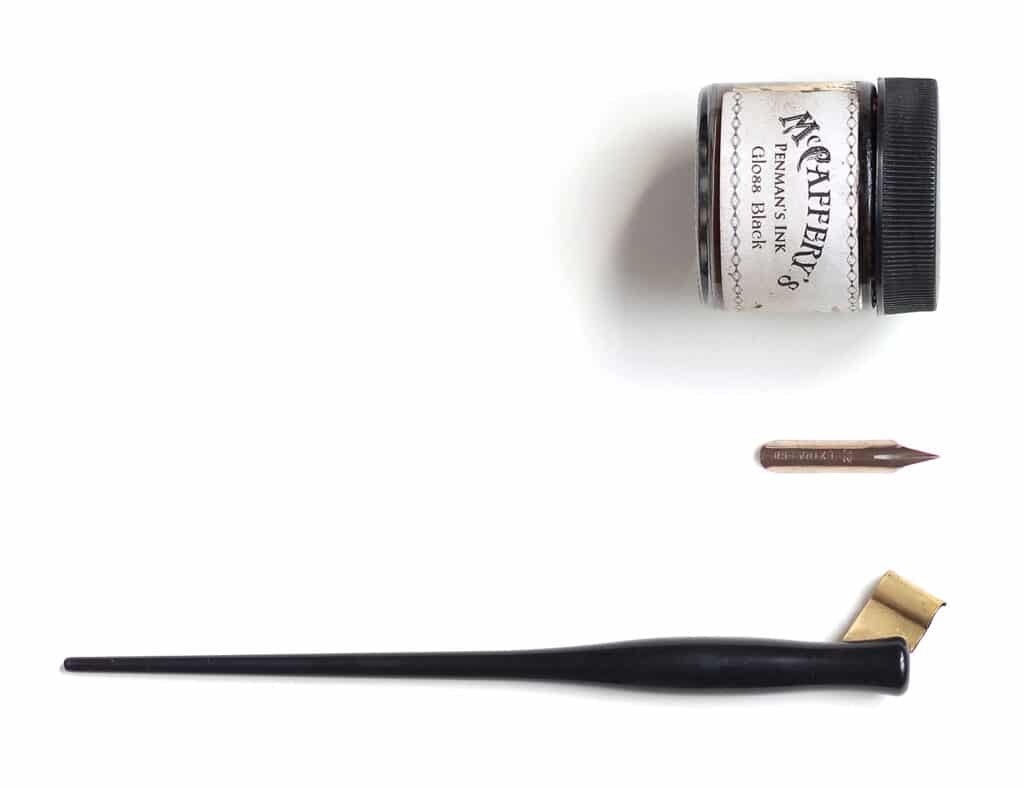
Here are some of my personal recommendations –
Pen holder – There are two main types of pen holders.
The straight holder and the oblique pen holder.
When we work with a highly slanted script like Copperplate (we will refer to this later in the article), we should use an oblique pen holder – simply because it is much more comfortable and easier to work with.
(handcrafted pen holders can be purchased from some Penmen)
Nib recommendation –
Keep in mind – new nibs are usually coated with a protective (transparent) layer, and you must prepare (clean) the nibs before you can use them – otherwise, the ink will just slip right off making it impossible to write with.
There are different ways of preparing your nibs, and the process is quite straight forward.
One way is to simply take some rubbing alcohol and rub it all over the nib, then you can just wash it off and dry it with a paper towel.
Ink recommendation –
Paper recommendation –
Practice paper can be ordinary art paper which is low absorbent (means it will not cause the ink to bleed) or paper of these following brands –
- Strathmore (Patchment)
- Strathmore (Watercolor – Smooth surface)
- Saunders Waterford (Watercolor – Smooth surface)
- A cheaper alternative (for practice) – HP premium 32
Check out this guide for more info. on the best calligraphy papers.
In addition to these specialized tools, we also need additional supplies including –
- A pencil
- Ruler – the rolling ruler is great for drawing guidelines and parallel lines quickly.
- And eraser

In case you cannot get a dip pen and a pointed nib, you can always start practicing copperplate calligraphy using a pencil.
Holding the pen correctly
Everyone has a different way to hold a pen due to their natural instinct.
However, in Calligraphy, holding a pen correctly is a critical factor that ensures smoothness while writing, and also prevents pain that can be caused for long periods of writing.
It also maintains rhythm and consistent writing speed.
Let’s have a look at how to hold the pen correctly –
STEP 1
Place the index finger on the tip of the pen holder so that the forefinger is placed facing down in the same direction of the nib.

STEP 2
Keep the pen holder at the third joint of the index finger (metacarpophalangeal joint)

STEP 3
Place the thumb on the left side of the pen holder so that the thumb is detached from the index finger.
The tip of the thumb is at the position of the first joint of the index finger.

STEP 4
Place the middle finger on the right side of the pen holder.
The first joint of the middle finger comes in contact with the pen holder.
The ring finger and the pinky curls inwards, place next to the middle finger.
They are the two fingers to lean against the paper surface when writing.

How to sit correctly – the importance of posture
Posture is something that is often overlooked by beginners, yet it plays an important role, and it directly affects the way you write.
Posture affects eyesight and body balance as you write, and below are some notes for posturing:
- Keep your back and neck up straight, slightly lean towards the upper part of your body
- Put both feet on the floor with your knees at a right angle (90º) to balance
your body - Place both arms on the table when writing, the right hand holding the pen and the left hand holding the paper
- Keep your elbows perpendicular and place them on the edge of the table (do not write on a round table)
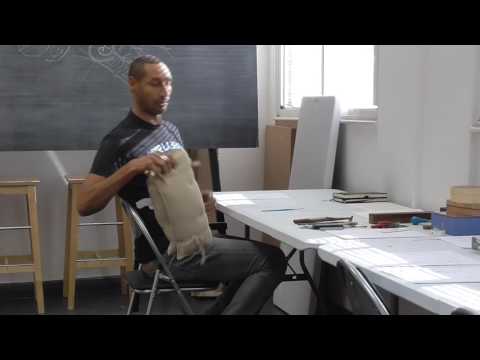
I highly recommend you checking out this video by Paul Antonio where he covers the topic more in-depth, and you can also have a visual example of how to sit correctly.
Sizing and angles of the Copperplate script
Sizing is another crucial aspect when it comes to the Copperplate script.
There isn’t a fixed size of the letters, however, maintaining the ratio is the most essential element.
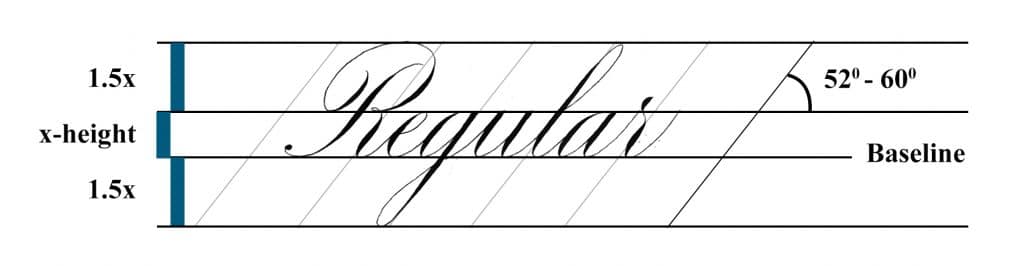
General letter height structure is divided into 3 parts –
- The central body part is also known as the ‘’x-height’’ – determines the size of the minuscules (lowercase letters)
- The bottom part is for descenders
- The top portion is for ascenders.
Keep in mind – The ratio of letter height in Copperplate is 1.5x: x: 1.5x
– Below you can see an example
Partial description –
- X-height includes one-space letters such as: a, o, c, e, i, u, v,…
- Part 1 + x includes upper letters such as h, k, l,… and capital letters
- Part x + 3 includes Lower letters such as g, y, j,… and some Capital letters
To put the ratio in perspective –
Let’s imagine that you decided to size your letters at 1 inch of height.
This would mean that the sizes would be –
- Ascender – 1.5 inches
- X-height – 1 inch
- Descender – 1.5 inches
The angle for the letters
Copperplate letters are always inclined to the right, the inclination ranges from 52 to 60 degrees from the baseline.
Ok, now that we covered the very basics we can move towards the writing part.
Writing rules and basic strokes
In Copperplate, the fundamental rule is to write with the nib at the same angle as the letter.
This is precisely why the oblique holder is easier to work with.
To make your writing even smoother and more comfortable feel free to twist the page, so your nib is pointing in the direction of the slant lines – it is better to turn the paper than your wrist.
The general rule of Copperplate is to write the upstrokes thin (without pressing the pen) and the downstrokes thick (pressing the pen).

Basic strokes are crucial elements in comprehending letter notions.
All letters in the alphabet belong to specific groups.
All letters in one group are similar in term of shape and usually encompass a specific basic stroke.
Lower case letters in Copperplate Script includes 7 main basic strokes.
Mastering these 7 basic strokes permits writing almost every lowercase letter in the alphabet, except for letter r, s, x and z (these letters belong to a select group which contains particular strokes)

Besides, Copperplate lowercase letters contain beginning and ending strokes.


It is essential to learn these basic strokes as they will provide you with the foundation for further development of your skills.
FREE downloadable practice sheets
You will find the free downloadable worksheets in the Lettering Crate.
Drop your email below, and you will get instant access to the Lettering Crate.

Stay updated with my tutorials and get instant access to the Lettering Crate –
A growing library of free lettering & calligraphy resources that includes –
The Lettering Crate is an exclusive member area with free worksheets and other freebies that I currently offer.
This worksheet will help you practice the seven basic calligraphy strokes.
All you need to do is download it, print it out, and start practicing!
Just remember to use non-absorbent paper.
A few extra tips
Now that we covered the basics, it’s time to wrap things up, but before that, I would like to share a few extra tips to keep in mind.
1. Clean your nibs
Calligraphy nibs require maintenance, this means that after you use them, you should wash the ink off to avoid them getting clogged. Simply wash them off with some water, and remember to dry them so they don’t rust.

2. Use guidelines
As previously mentioned, the Copperplate script follows specific rules when it comes to sizing and angles.
By using guidelines, we facilitate the use of these rules.
3. Practice consistently
By practicing consistently, you will start building something called muscle memory which is essentially a form of procedural memory that involves consolidating a specific motor task into memory through repetition (source – Wikipedia)
In other words – the more you do it, the more you will improve.
Additional resources for further learning
If you want to learn more about the Copperplate script, I wrote an e-book that covers this topic more in-depth.

The e-book is structured in 5 main parts –
- Preparation: Tools and materials, how to hold a pen, posture,…
- Basic knowledge: Letter inclination, letter height, and ratio, basic strokes,…
- The alphabet: Capitals letters, lowercase letters, and letter structures
- Rules for connecting and kerning letters
- Flourish: The Oval rule and how to apply it
You can check it out here.
Aside from the Copperplate script, I also wrote several other Ebooks that will help you learn other calligraphy scripts and techniques such as – blackletter, italic, business cursive, ornamental lettering, and more.
You can find them all here.
You can also check out my article on the 10 calligraphy styles for beginners.
Another book that I would like to recommend is – ”Universal Penman” by George Bickham.
Also, be sure to check out the Iampeth.com website; they have great resources on the Copperplate script.
Final words
The Copperplate script is a very beautiful and dynamic calligraphy style that requires years of practice in order to master it.
Consistent calligraphy practice is very important, but the way you practice and having all the elements in the right place is a crucial factor for progress.
If you’re a complete beginner and you would like to learn more about calligraphy in general, check out the calligraphy beginner’s guide first.
Are you struggling with something in particular about calligraphy/lettering?
Be sure to check out our official Facebook group.
It’s a place where you can share your work, get feedback, ask questions, and hang out with fellow lettering/calligraphy artists.
Thank you for stopping by and until the next time,
Stay AWESOME!
Pin me!
About the author
My names is Tri Le, Calligraphy came to me by chance. When I was still a graphic designer, I was given a pretty fancy pen from one of my brothers, which changed the entire my works since then. After that moment, I have chosen Calligraphy as my main career path. For writing Calligraphy, calmness and relaxation always been interested me.
Like any other arts, the art of calligraphy also needs a lot practicing. Most importantly, it is a passion and a burning zeal for the letters – If you have enough willpower along with the patience to practice, everyone can tame the most discerning pen in Calligraphy.
This is an excellent article. Thanks for sharing it with us. I worked in Old English and Medieval in the early nineties. I would love to start again by taking up the Copperhead script. Keep up the good work!
Dale
Thank you, Dale! I’m glad you liked it!
dropping my Emil to get worksheet access thanks
I am a big fan! Thanks for making it easier to get off the ground! Best regards, Linda Weeks 01/24/2021
Hey Linda! Always happy to hear from you 🙂 Thank you for the kind comment.
Dzień dobry!
Chciałabym kupić Twoją książkę, gdzie w Polsce mogę ją kupić?
Zależy mi na książce a nie na ebookach,
Pozdrawiam
Barbara
I’m afraid that Tri is only selling e-books. At least as far as I know.
This is so accurate and we’ll explained. Hopefully I’ll be able to learn this someday :).
Thank you so much for this piece of article. This encouraged me to go ahead and practice.
Thank you for the kind words Naaz. 🙂
This is so pretty. I’ve been practicing the basic strokes and would love to try this.
It’s fairly similar, it’s good you started with the basic strokes. It provides you with a strong foundation. Everything will be so much easier to learn and practice! 🙂
Many thanks in advance for your advices, easily followable videos and the exercise sheets.
Thank you, Maria! It means a lot to hear that 🙂
Loved the detailed explanation.
Thank you so much.
Tri , I love seeing your work on Instagram and Pinterest. Something I wonder about -are you self taught? Do you have a mentor? Who inspires you? ..and you seem to prefer to practice on graph paper-can you tell me a bit about that?
Thank you, Max for featuring an Tri on your page! Very likely the most specific article for beginners Ive ever read.
Thank you Morgen, Im glad you liked this post! Perhaps you’ll get a faster response from Tri if you DM him on Instagram 😀
Hello!
This was very useful but do you have any more information on being left handed?
Thank you, great place to start!
I’ll do my best to include such a section in the upcoming update 🙂
I learned calligraphy
Well, I am sure glad to hear that 🙂
Hi can’t seem to subscribe.i have checked my spams and all but nothing. Help me out plz.
Thanks
Hey there, for technical issues it’s really best to email me directly. Please do that and send me your email address with it so i can check it from my end 🙂 thanks!
Gracias muy buenos consejos para los principiantes
the page on pinterest says that there are some free downloadables. I couldn’t find any on this page?
Hey Sibel, you must sign up for the newsletter in order to get access to the Lettering Crate. Once you do that you will be able to download all the available freebies. Let me know if you need any help
This was great, but it is all for right-handed people can you show some techniques for left-handed people?
Hey Cyndy, we are currently working on something for left-handed calligraphers. Stay tuned 🙂
Thank you for your teaching good lettering. Looking forward to each lesson.
You are most welcome! 🙂